
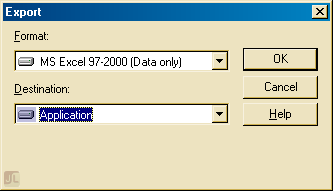
Following up on my article on correcting disappearing headers, a further issue with our web-report is that even an export to Excel (Data Only) from Crystal Reports 9, created extra columns. This issue could not be replicated on the client machine (ie. from my workstation). I would have to upload the report to the server, configure the web application to use the newly uploaded report, export to a Crystal Report, which in turn we export to Excel:
Note that as this is from within a web application, there are no extra options or dialogs to select. The export had to work from this point on. I can't take any credit for the below as it was copied from http://hosteddocs.ittoolbox.com/ST030504.pdf. A "Crystal Decisions" documentation.
Blank columns appear when exporting to Excel.
There are four main causes for extra blank columns to appear in a worksheet.
Cause 1: Fields in the same column are not aligned with guidelines or snap-togrid
To prevent fields from appearing in different rows, horizontally align fields with guidelines:
- In Design view, click the vertical ruler to create a vertical guideline.
- Click one of the fields in the section, and drag it to the vertical guideline.
- The field should ‘snap’ to the guideline. When the corners are highlighted in red, this indicates the field is snapped to the guideline.
- Repeat step 2 until all the fields in the section are snapped to the vertical guideline(s).
- Set the object’s size and position by right-clicking the field, selecting Object Size and Position and then setting the XY coordinates.
- Use the horizontal and vertical rulers as a reference when specifying height, width, and XY coordinates.
- Export the report to Excel and all the fields in the section appear in the same column. Extra blank columns will not appear.
Cause 2: Objects in the same column have different widths
To ensure all the objects in the same column have the same width:
- Select all the objects (such as database fields, column header text objects, and summaries or subtotals) in the column by holding down the Shift key while clicking each field, until all the fields are highlighted.
- Right-click any of the fields, click Size, and then select Same Width. This widens all the fields in the column until they are the same width as the widest object in the column.
- Export the report to Excel and on extra blank columns will appear in the worksheet.
NOTE: Fields formatted so they are much wider than the actual size of the data can cause blank columns. Make sure the field width is just wide enough to display the longest data value.
Cause 3: Fields and objects in the same column do not have the same text alignment
For example, the column heading text object is aligned to the right, while the database field is aligned to center.
To ensure all objects have the same alignment:
- Select all the objects (such as database fields, column header text objects, and summary or subtotals) in the column by holding down the Shift key while clicking each field, until all the fields are highlighted.
- Right-click any of the fields, then click Format Objects. The Format Editor dialog box appears.
- From the Common tab, specify an alignment in the Horizontal Alignment box.
- Click OK to return to the report. All the objects in the same column now have the same alignment.
- Export the report to Excel and there will be no extra blank columns in the worksheet.
Cause 4: Fields or objects with different font size and formatting (bold, italics) can cause blank columns
To ensure the same font formatting for all objects in a column:
- Select all the objects (such as database fields, column header text objects, and summary or subtotals) in the column by holding down the Shift key while clicking each field, until all the fields are highlighted.
- Right-click any of the fields, then click Format Objects. The Format Editor dialog box opens.
- From the Font tab, specify a size and format for the object’s box.
- Click OK to return to the report.
Category: Excel :: Article: 271


Add comment