
An article to remind me how to install an SSL certificate with GoDaddy.
Why?
A quick reference for myself as I found that with GoDaddy, a purchased SSL certificate seems to require re-installing each year despite it's expiry in a couple years time.
The first time I did it, there were more steps; the second time I just did as per the below. If I ever have to do the long process again, I'll add it to this article.
How?
I know there are instructions on the GoDaddy website but this is how I do it along with screenshots:
- Login to your GoDaddy panel and expand the menu by clicking the caret by your name in the top right corner, then click on "My Products":

- Scroll down to SSL Certificates and click on the "Manage" button alongside the domain you want to install the SSL certificate for

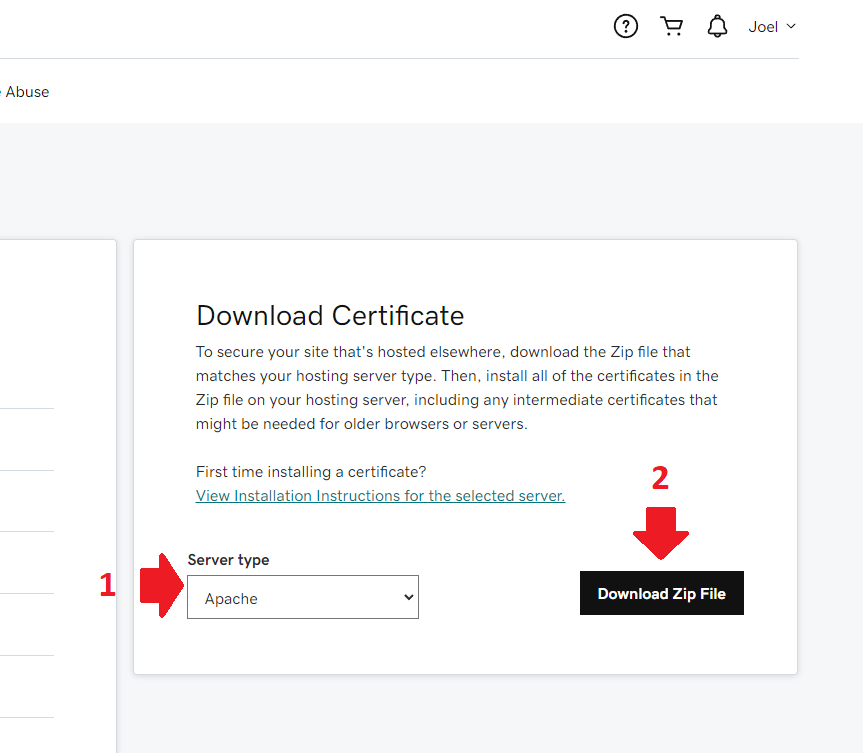
- Select the Server Type and then click on "Download Zip File" button
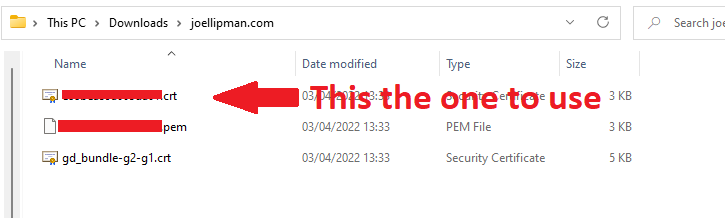
- Decompress the ZIP and find the CRT file
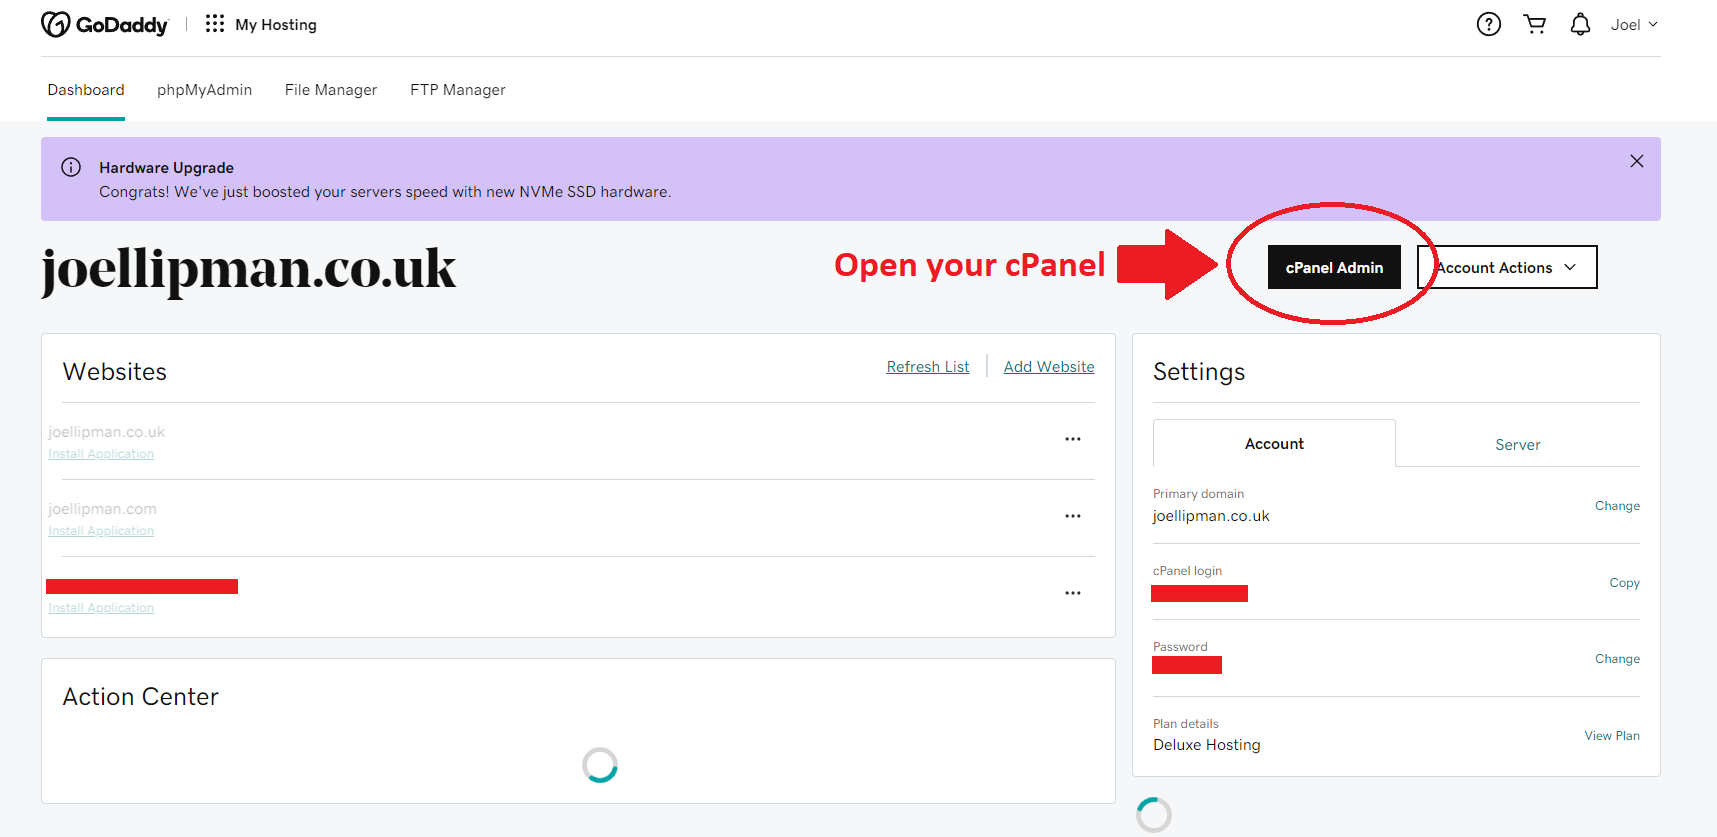
- Return to your GoDaddy page and scroll down to "Web Hosting" then click on "Manage"

- Click on the "cPanel Admin" button to go to your cPanel
- Type SSL in the search to filter by icons relevant on your cPanel dashboard and then click on the "SSL/TLS" icon

- Click on the "Generate, view, upload, or delete SSL certificates" link in the right sidebar

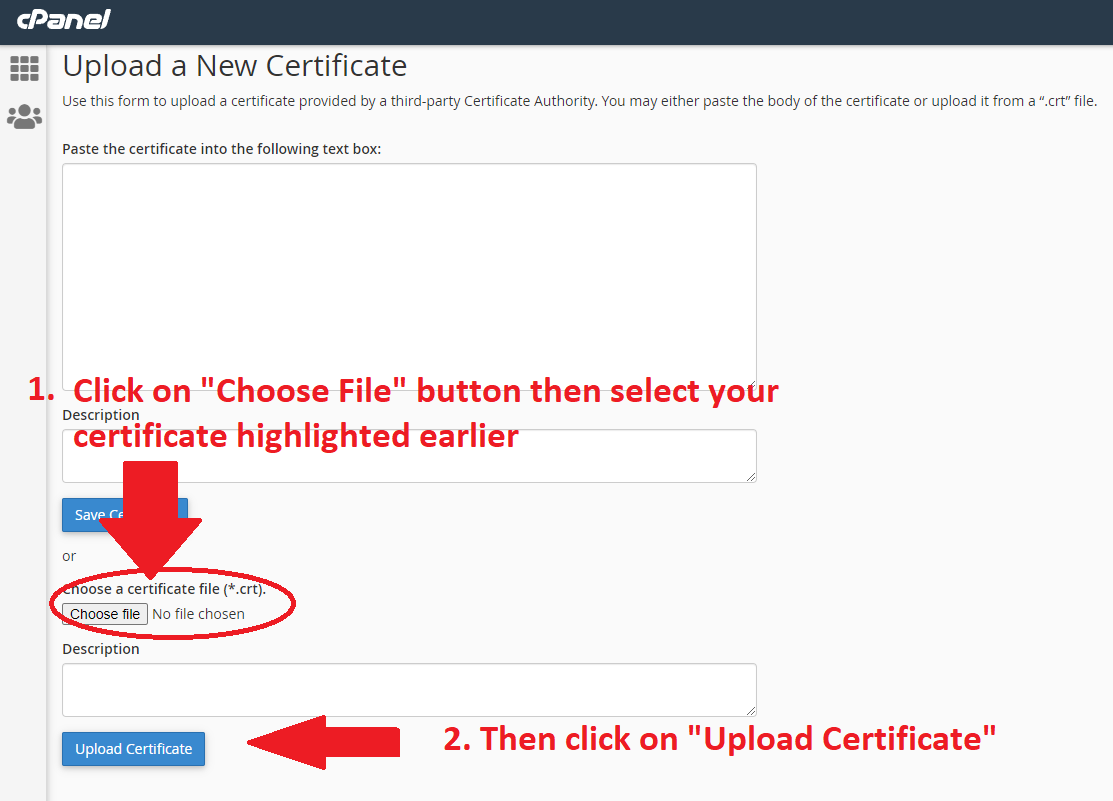
- Scroll down and click on "Choose File" button under the "Upload a new certificate" section > Then select the certificate file noted earlier in step 4 (the one you downloaded as a Zip) then return to this screen and click on "Upload Certificate"
- Return to the SSL/TLS page from your cPanel dashboard and click on "Manage SSL Sites"
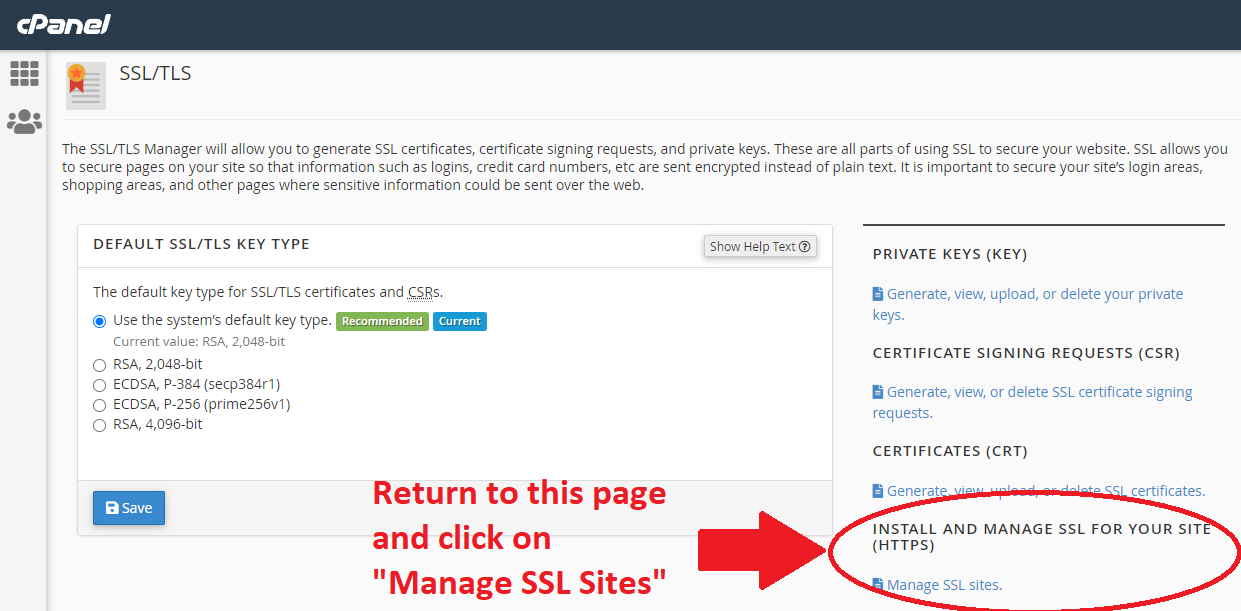
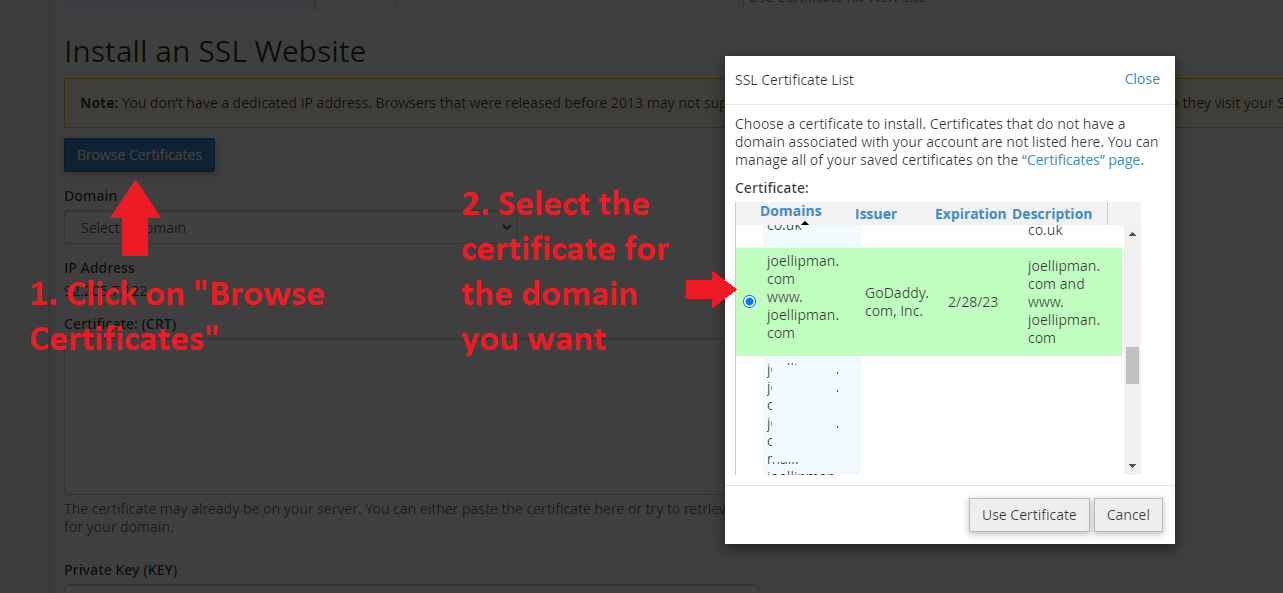
- Click on "Browse Certificates" then select the certificate for the domain you in the popup that appears (it's a list of the uploaded certificates)
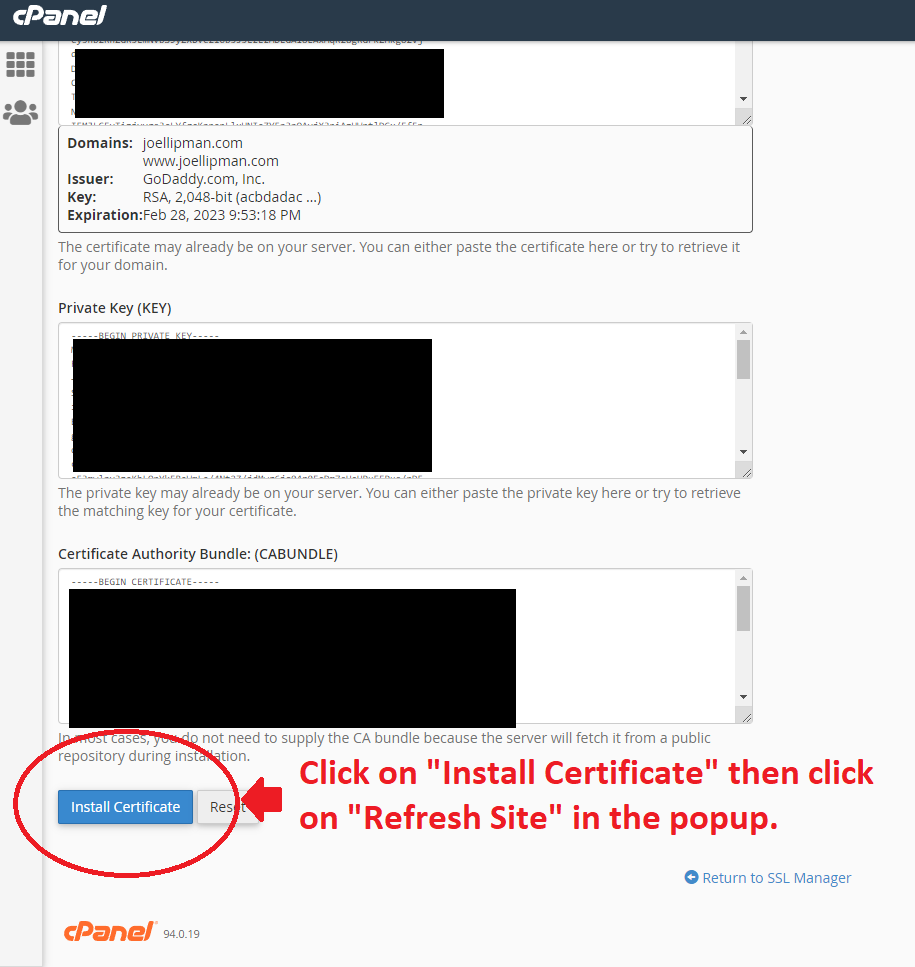
- Finally, click on "Install Certificate" and then click on the "Refresh Site" button in the popup. (if already installed it just lets you click on "Ok").
Initially I got a support agent from GoDaddy to do this who said it would take about 6 hours to 2 days to take effect. Not sure what was supposed to happen but 2 days later it still wasn't working. I followed the process above and it took immediate effect...
Update 2024
So I've run into the issue that when downloading the certificate from GoDaddy and followed the steps above but it kept showing the certificate for last year.
- Chatted to GoDaddy who said use incognito mode and clear cached files - same result
- Downloaded the ZIP file from GoDaddy for the 7th time and extracted the 3 files
- Opened CPanel and went to the SSL/TLS manager and clicked on "Manage SSL sites"
- Opened the first certificate file (the one with numbers, letters with extension CRT), copied the contents to clipboard then pasted under "Install an SSL Website" into the "Certificate" textarea field.
- Duplicated the tab and went to the SSL/TLS page in CPanel and clicked on "Generate, view, upload, or delete your private keys".
- Clicked on "Edit" alongside the domain name I wanted to install this SSL for.
- Copied the "Encoded Private Key" to clipboard and pasted this back under "Install an SSL Website" into the "Private Key (KEY)" textarea field.
- Opened the bundle certificate file from the ZIP file in notepad and copied&pasted the contents into "Certificate Authority Bundle: (CABUNDLE)" textarea field.
- Clicked on "Install Certificate"
- A popup confirmed the domain and then using other browser profiles, I was able to verify that SSL had successfully been applied...
Category: cPanel :: Article: 812


Add comment