This is a quick article I use to list step by step on how to set up a custom domain for a Zoho Creator customer portal. In this example, we are going to use a subdomain of a company which has the domain joellipman.com.
Why?
This took me a bit of going backwards and forwards to Zoho rather than getting my client to do this. The aim is to take up as little time as possible of the third-parties involved, plus the documentation online was in parts and requires going to several pages across the Internet. Here I have 1 page and 1 article documenting the process.
How?
I'm breaking this down into 3 stages:
- Zoho Creator: Specify Custom Domain
- Domain Registrar: Setup subdomain and add CNAME
- Zoho Support: Get Zoho to setup SSL
1. Setup Custom Domain
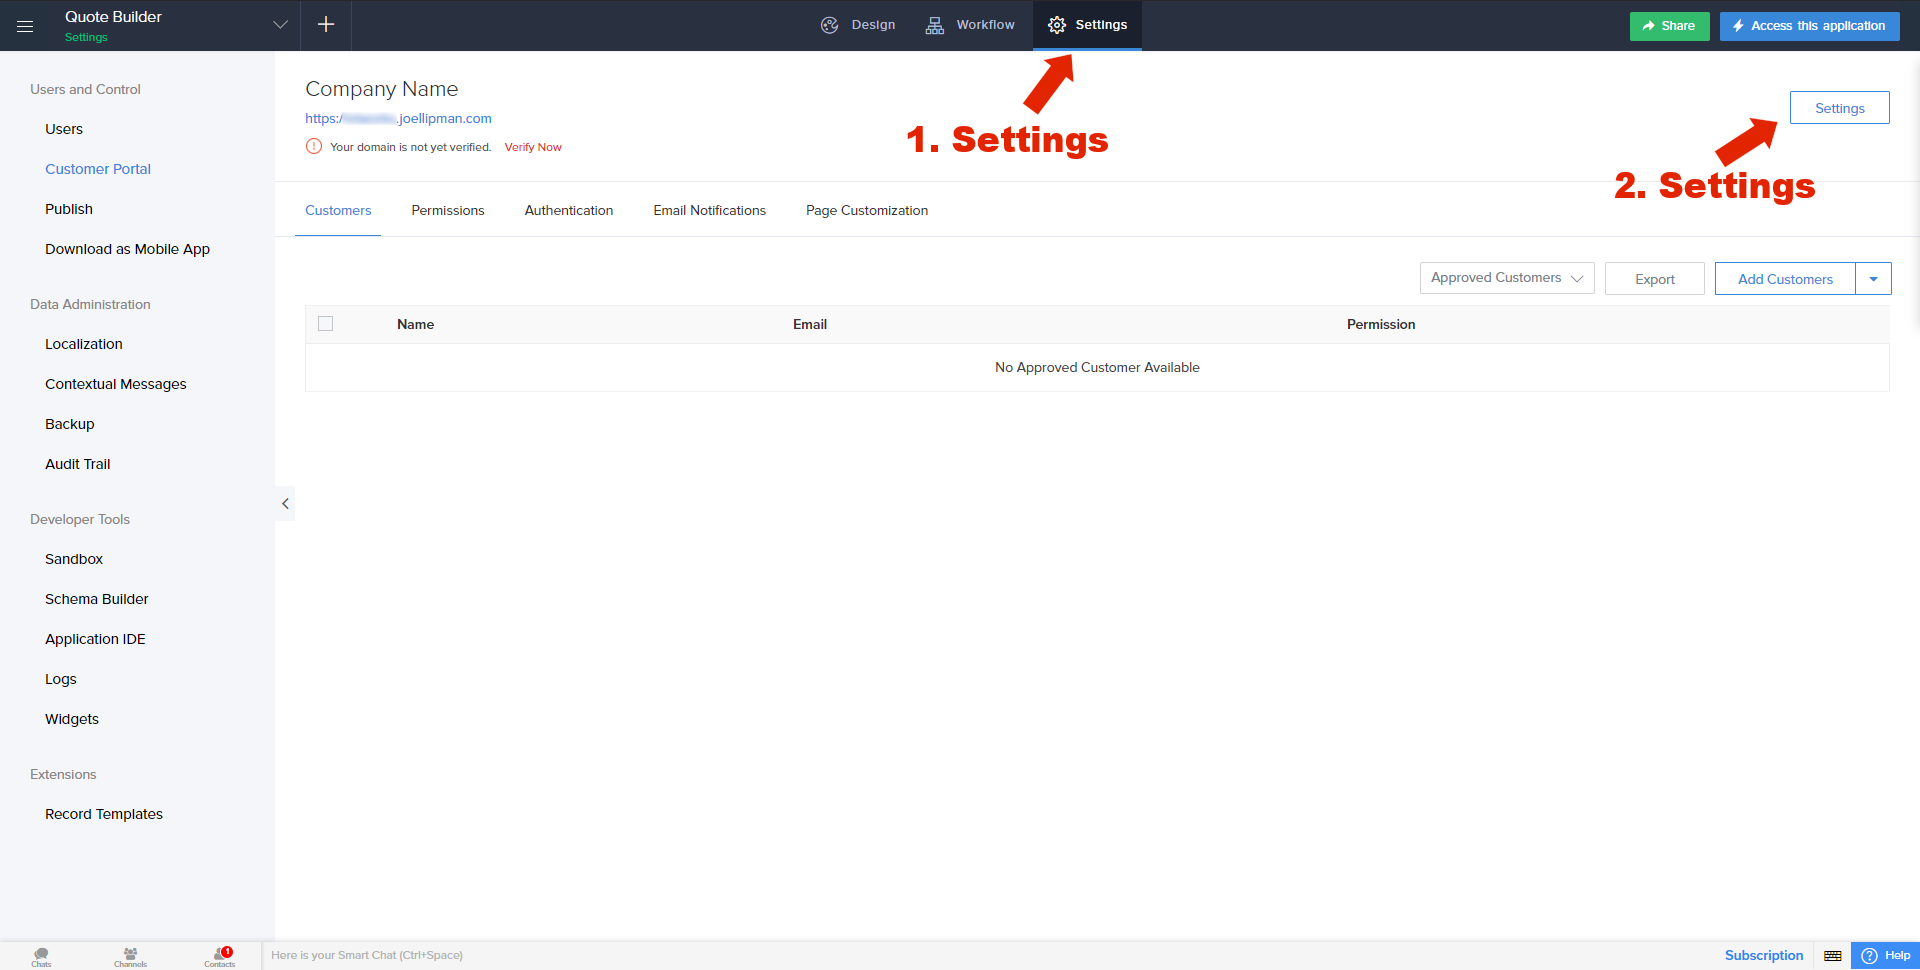
- So go into your Zoho Creator app and go to the "Settings" tab, then on "Customer Portal" then on the "Settings" button in the top right:
- Under Portal URL, select "Custom Domain" and in the field below, enter the full domain (incl. subdomain) you want to use:
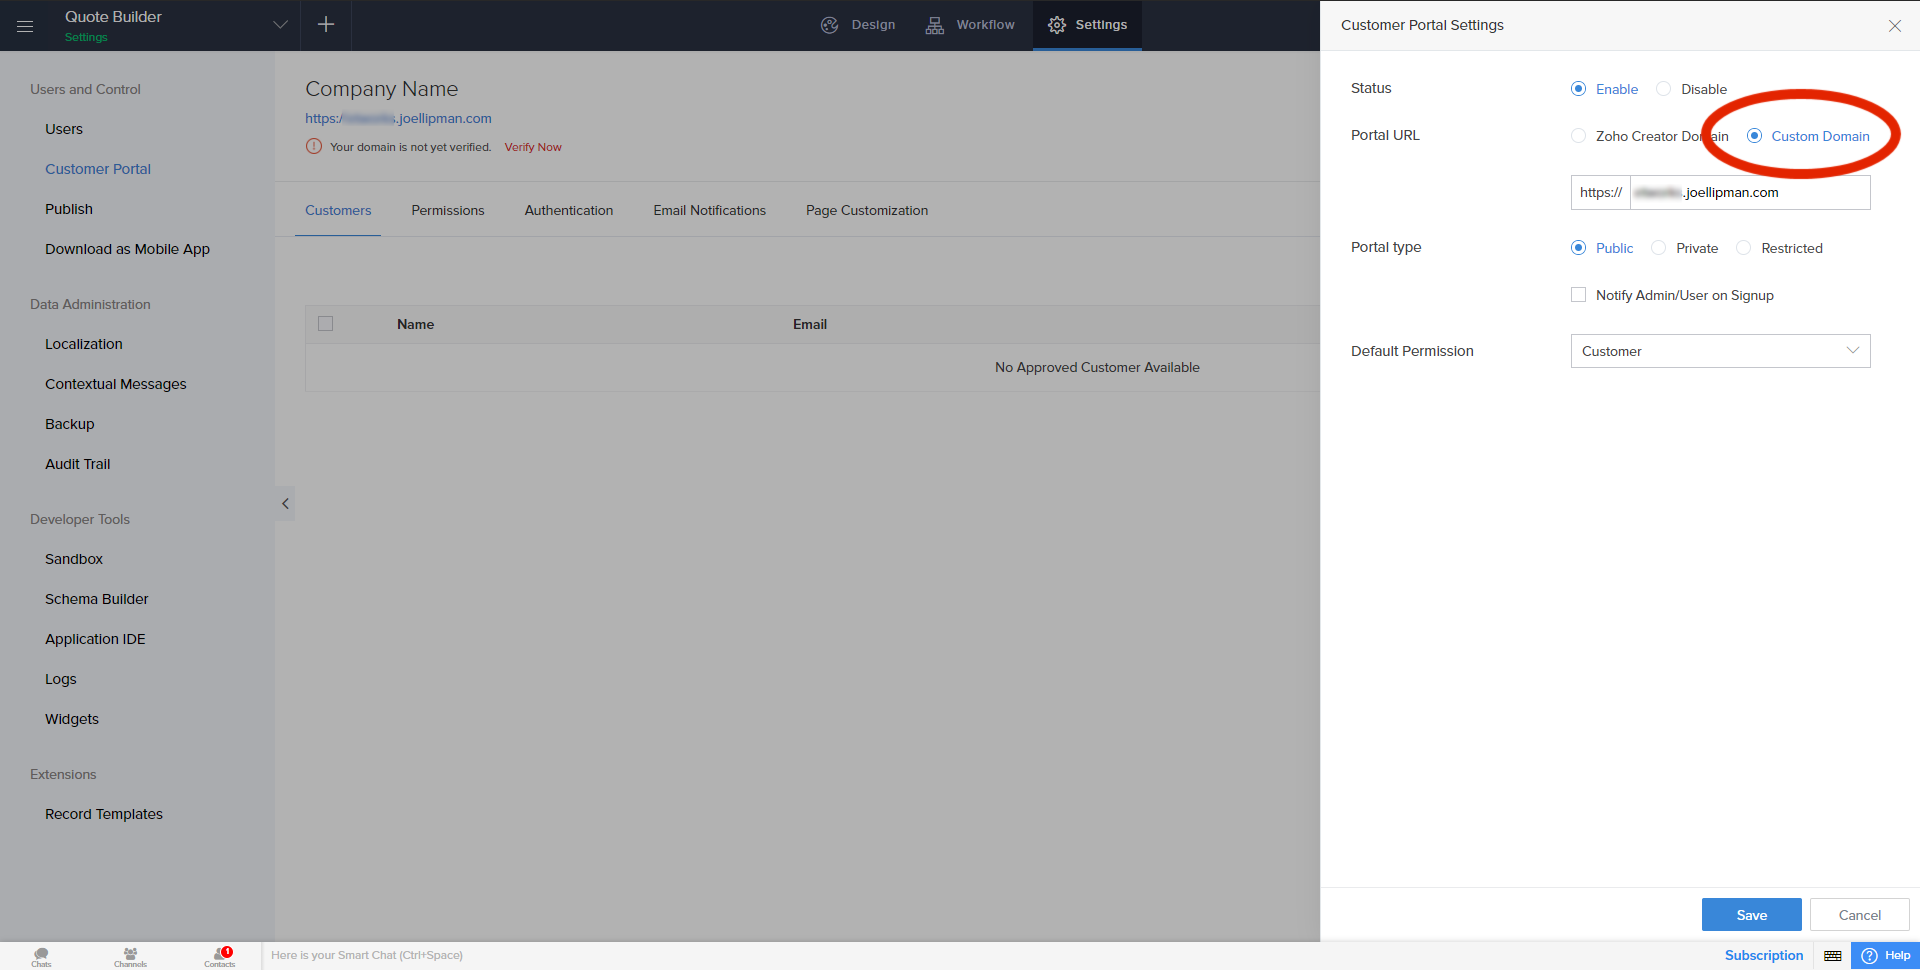
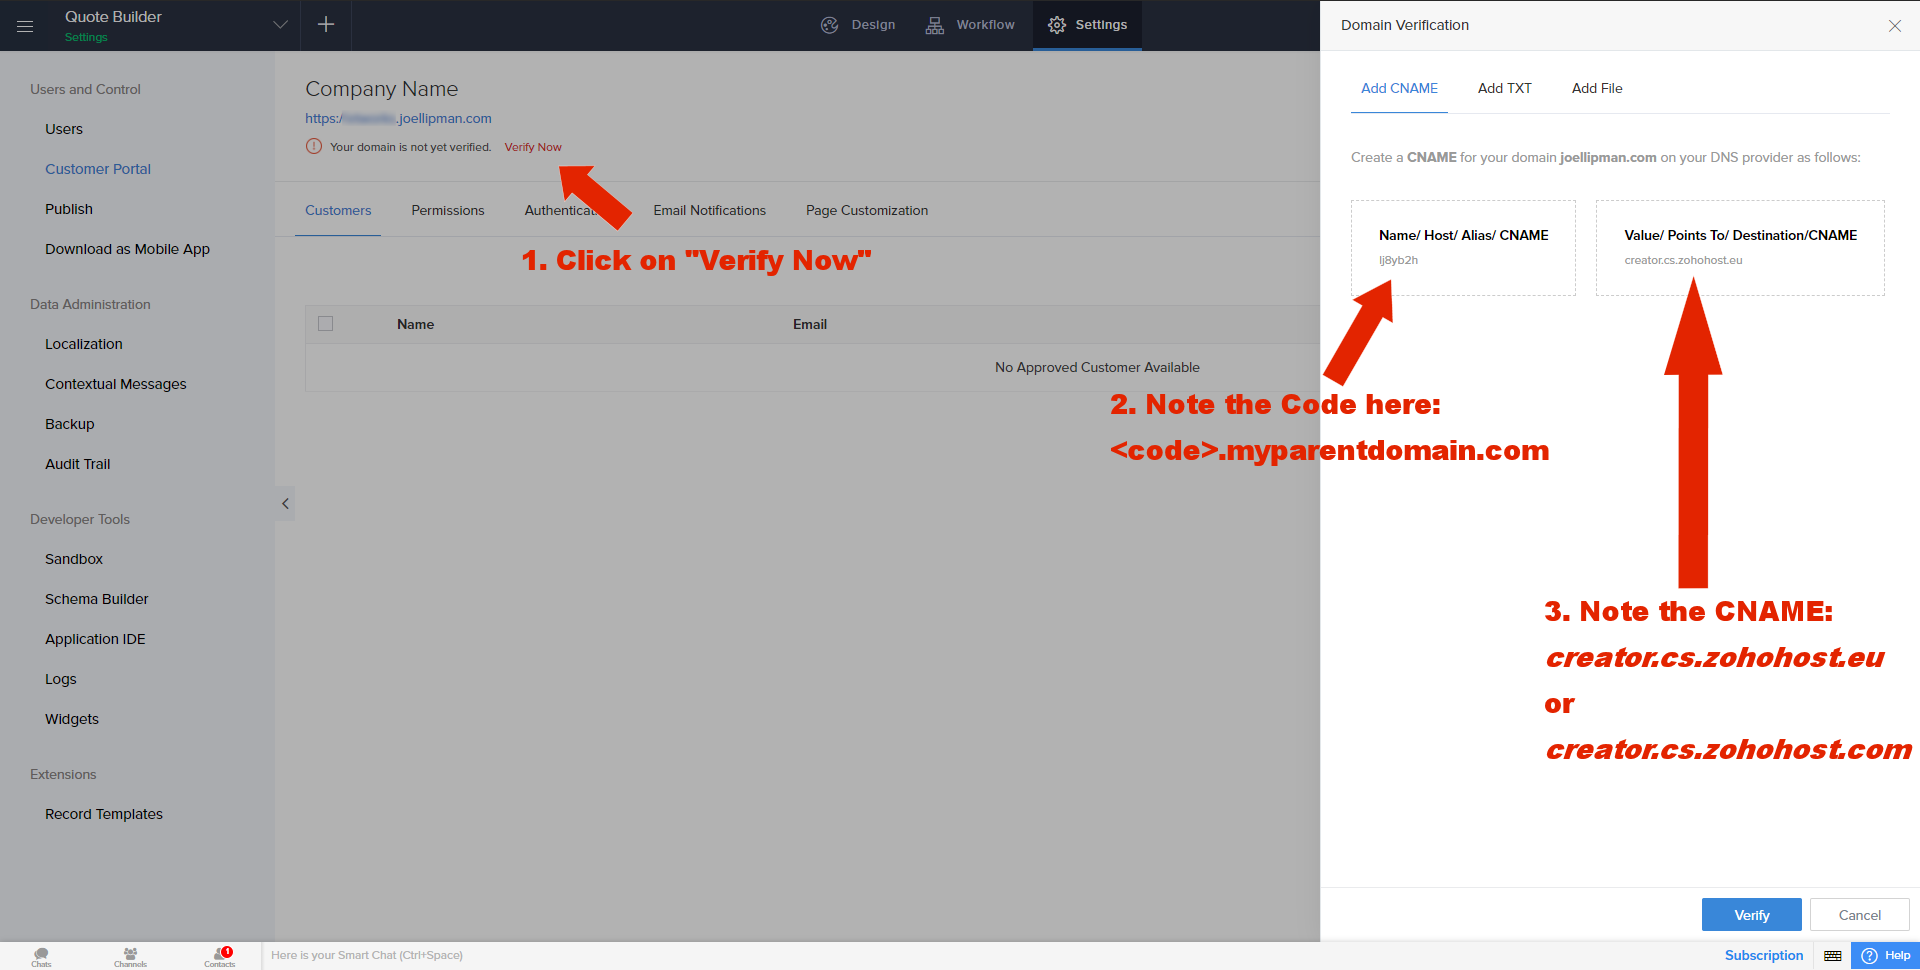
Then click on "Save". - If you have access to the DNS manager for the subdomain/domain of your customer portal, or you have the customer on a remote assist who has access to do this, click on the red "Verify Now" link. The sidebar for "Domain Verification" will poup on the right. Note the small code and prefix it to your parent domain (eg. abcd12.joellipman.com) and note the CNAME which will either be creator.cs.zohohost.eu or creator.cs.zohohost.com depending on your datacenter:
2. Setup your Domain/Subdomain
The process here is dependent on your service provider or domain registrar (website where you registered your domain). I've listed some third-party providers' instructions on how to set up a CNAME record at the bottom of this page.
A subdomain is FREE as opposed to paying for another domain. If you want to put the customer portal on a subdomain (eg. "customerportal.joellipman.com" instead of "www.joellipman.com"), then please refer to your domain registrar's website on how to setup a subdomain.
Here is the gist of what you need to do in your respective Domain Manager system (website where you registered your domain):
- Setup your subdomain using the registrar's control panel, go through the process until this part is complete.
- Find the DNS Manager in your control panel, it might be called something like "Advanced DNS Editor", "Advanced Zone Editor" or "DNS Zone Editor":
- If the subdomain has a CNAME record, modify it as per the below (not the "Name" just the "CNAME" value)
- Name will be something like <mysubdomain>.mydomain.com. and www.<mysubdomain>.mydomain.com.
- TTL = 300
- Type = CNAME
- CNAME = creator.cs.zohohost.com or creator.cs.zohohost.eu depending on the value obtained step 1c above.
- If the subdomain has a CNAME record, modify it as per the below (not the "Name" just the "CNAME" value)
- Add another CNAME record with the following:
- name as <code>.myparentdomain.com ("code" is 6-character code obtained in step 1c above)
- If allowed set the TTL (time to live) to 300
- Set the CNAME value to creator.cs.zohohost.com or creator.cs.zohohost.eu (depending on if you access zoho.com or zoho.eu)
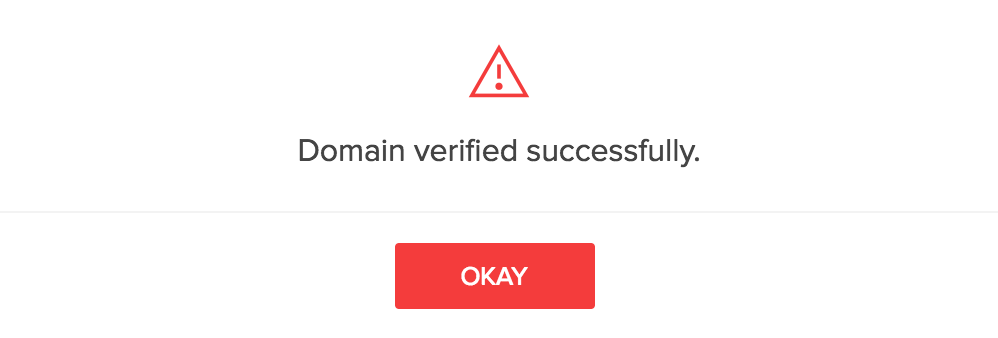
- Back in Zoho Creator, click on "Verify Now" and you should get a response saying "Domain Verified Successfully":
Important: You should now have at least 2 CNAME records against this domain/subdomain. I usually have 3: <code>.joellipman.com (used in verification), <sub-domain>.joellipman.com and www.<sub-domain>.joellipman.com (for the subdomain). I have had this working with the 2 CNAME records though.
Some providers say this will take between 24-48 hours but I have often found that after a few hours, the effects have been propagated. A test I like to do is open the command-line in MS-Windows or the terminal on MacOS, and ping both creator.cs.zohohost.com and the subdomain example.joellipman.com. These should both respond with the same IP address.
3. Get Zoho to setup authorize
As a Zoho Partner, you now need to get in touch with Zoho Creator Partner Support (This email address is being protected from spambots. You need JavaScript enabled to view it. // Zoho Cares). Advise them that you have verified the domain using CNAME and that the CNAME record is setup. You will need to give the full path of the custom domain (eg. https://mysubdomain.joellipman.com), I include the app owner and app name. Then you need to give them edit access by doing the following:
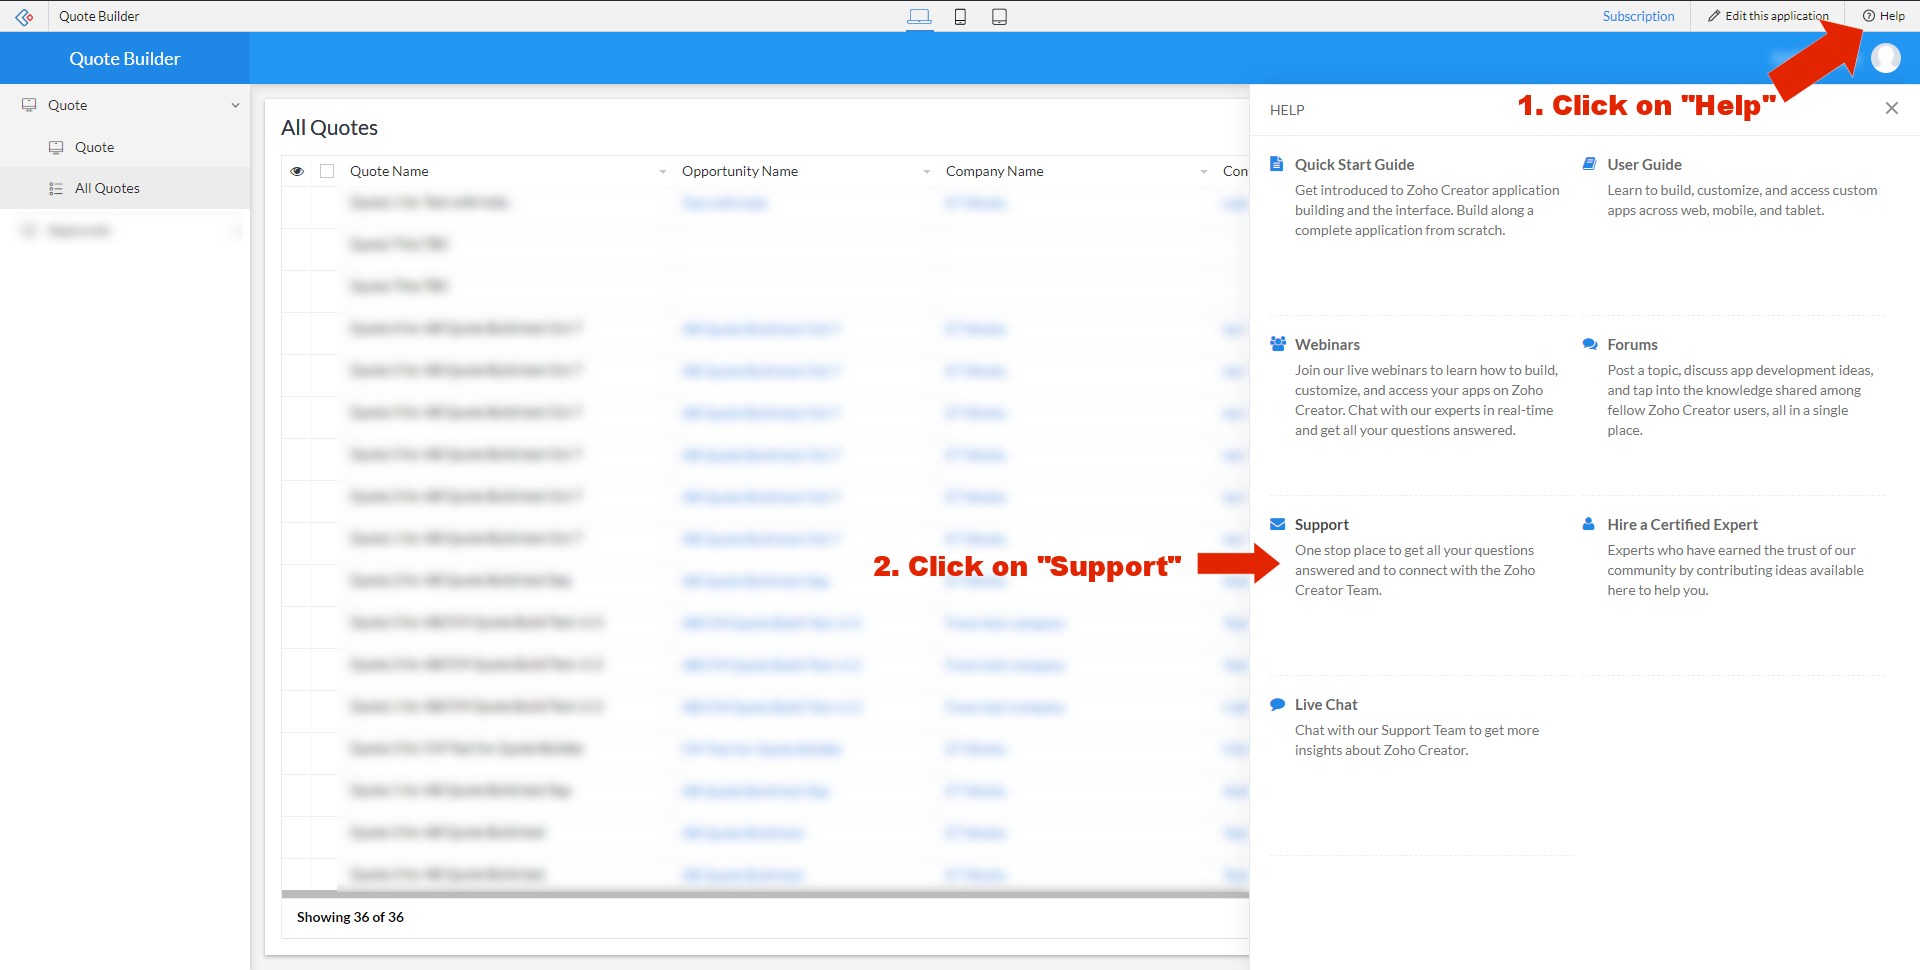
- Go to your Zoho Creator "Access this Application" and click on the "Help" link in the top right then click on the "Support" link:
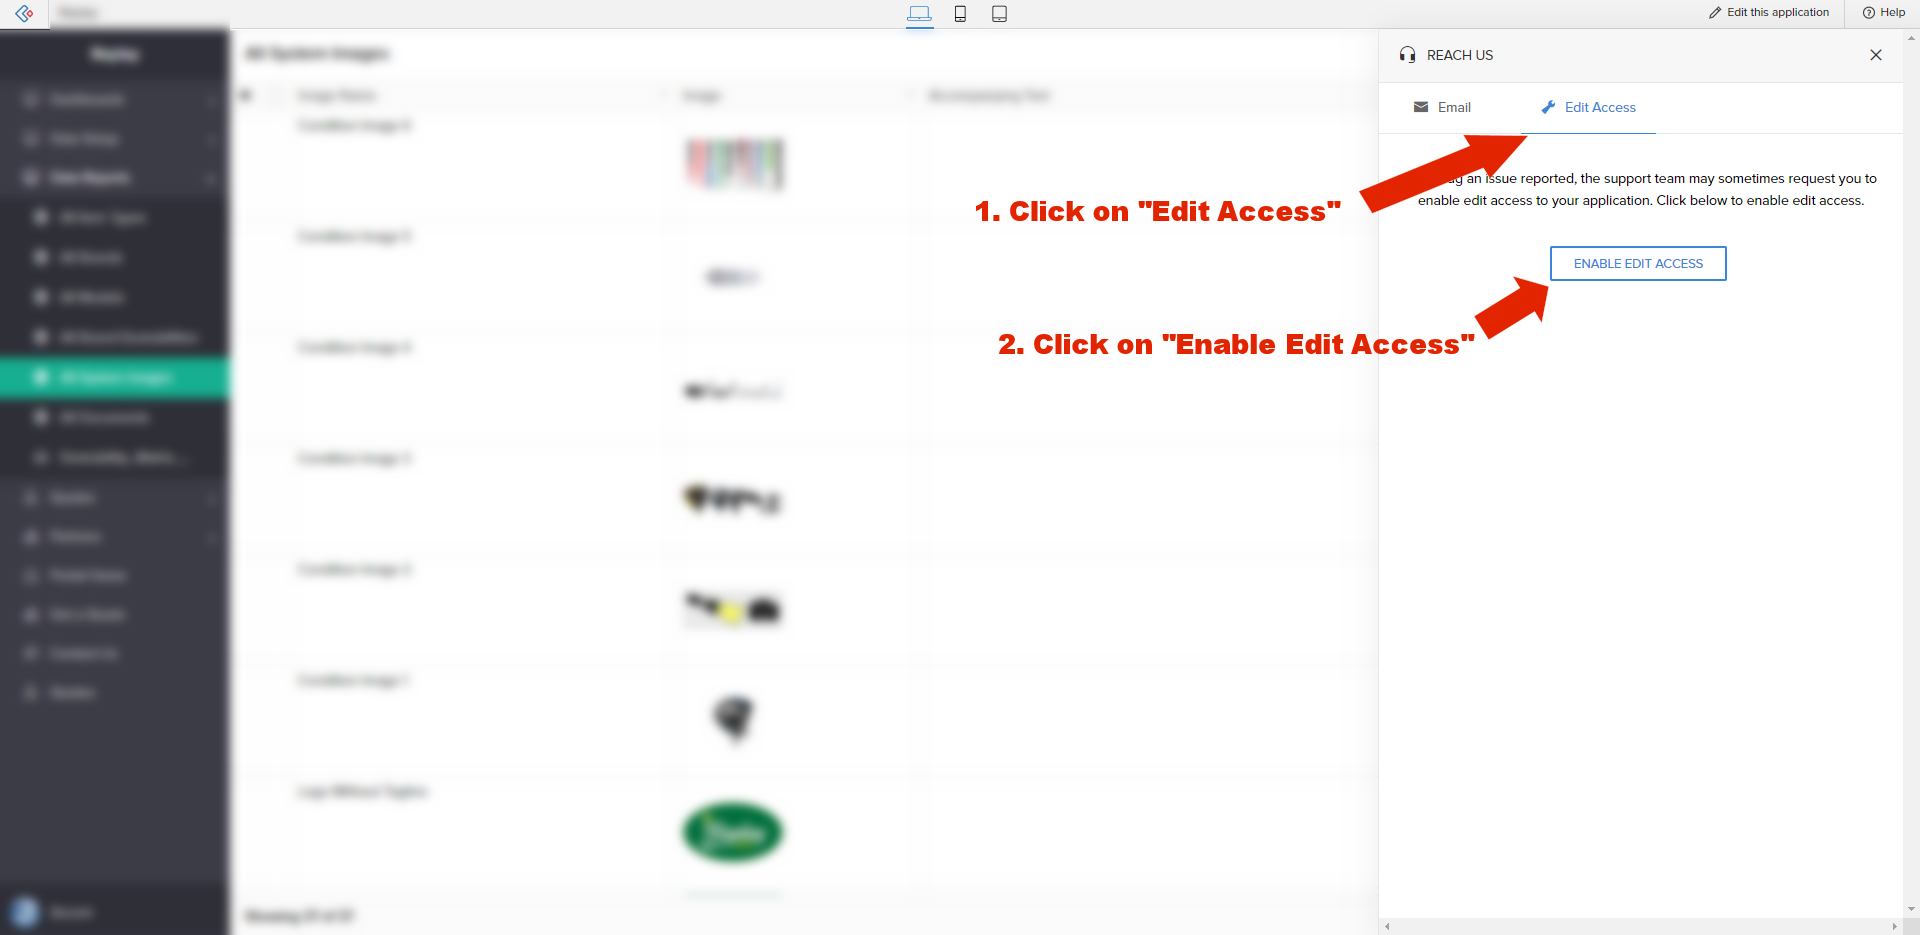
- A sidebar on the right should change to "Reach Us" with an emailing form, we don't want to do that, just click on the "Edit Access" tab at the top next to "Email" and then click on the "Enable Edit Access" button:
- Advise Zoho Creator Partner Support (This email address is being protected from spambots. You need JavaScript enabled to view it. // Zoho Cares) you have done this and thank them for their help.
- Wait till they confirm they have setup the SSL certificate on their side, test by visiting the portal in an incognito/inprivate window and you are done.
Source(s):
- Zoho Creator - Setting up custom domain for the customer portal
- Zoho Creator - Verify custom domain of the customer portal
- Zoho Creator - Grant Edit Access
- cPanel Docs - Zone Editor
- Crazy Domains (UK) - How to Add and Update CNAME Records
- 123 Reg - How do I set up a CNAME record on my domain name?
- GoDaddy Domains Help - Add a CNAME record