This is an article documenting how to create a Zoho Creator Widget which includes the Bootstrap and jQuery frameworks as well as other JavaScript functionality.
Why?
Quite simply that at time of print (2020-10-24), Zoho Creator does not allow you to use JavaScript anywhere in its app. HTML and CSS are mostly allowed but JavaScript automatically gets removed from any of your code.
How?
As someone who's been using Zoho services and programming in Zoho Deluge for a few years now, even I thought of Zoho Widgets as a daunting task. But after doing some, I realize this is actually very quick to do and much easier than first thought. The article below documents how to create your first widget in a MacOS environment. I aim to create a WindowsPC version of this document at some point for my colleagues. The below instructions follow a fresh install as if this is the first time this computer has created a Zoho Creator Widget.
Software used:
- Zoho Creator v5 (Plan Premium or greater is required - includes Zoho One)
- macOS Catalina v10.15.7
- Safari v14.0
- MS Visual Studio Code v1.48.2
Prerequisites
- Download nodejs source code from https://nodejs.org/en/download/. Don't worry about knowing anything about nodejs, as long as you know JavaScript and HTML/CSS you can use this:
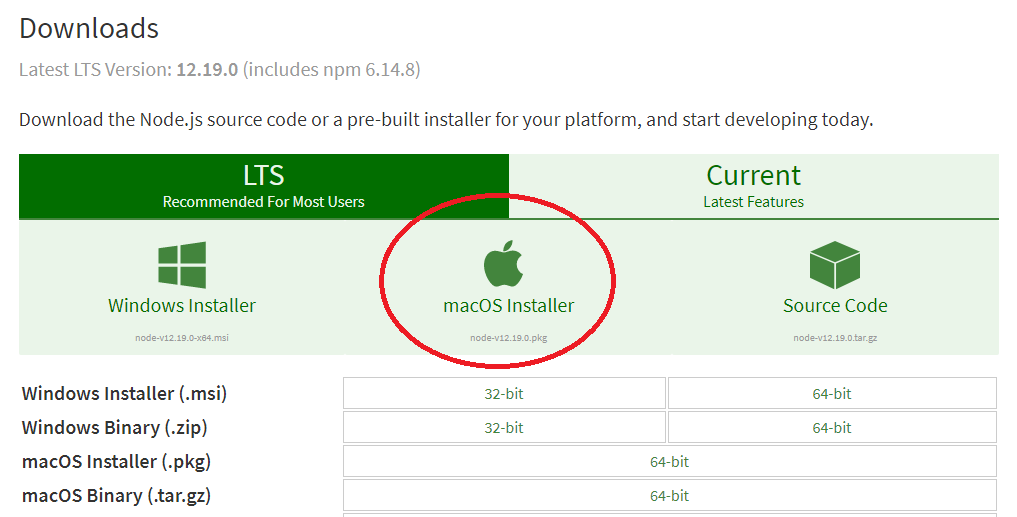
- Execute the download and go through the installation process with the final step to move it to trash/bin.
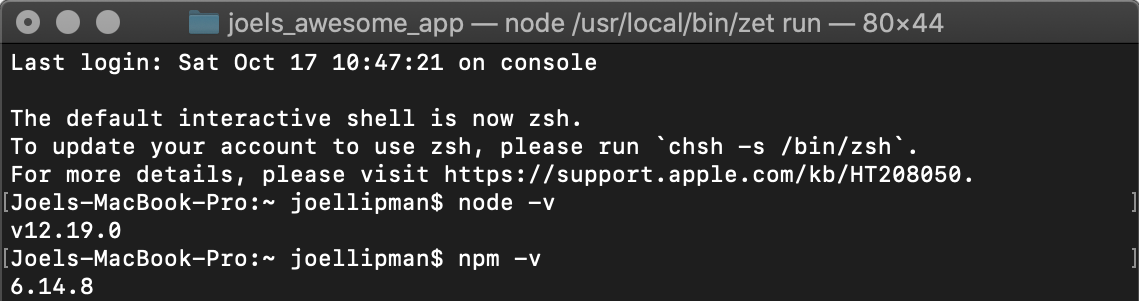
- Open the terminal app on your Mac and type the following to test the install:
You should get a version number for each of these as a response. Failing this you should check your security and privacy and ensure that you have permission to install the above, then re-install.
Install the Zoho Extension Toolkit (ZET) via command line interface (CLI)
- In the terminal, type:
If you get errors like “Missing write access to/usr/local/lib/node_modules”
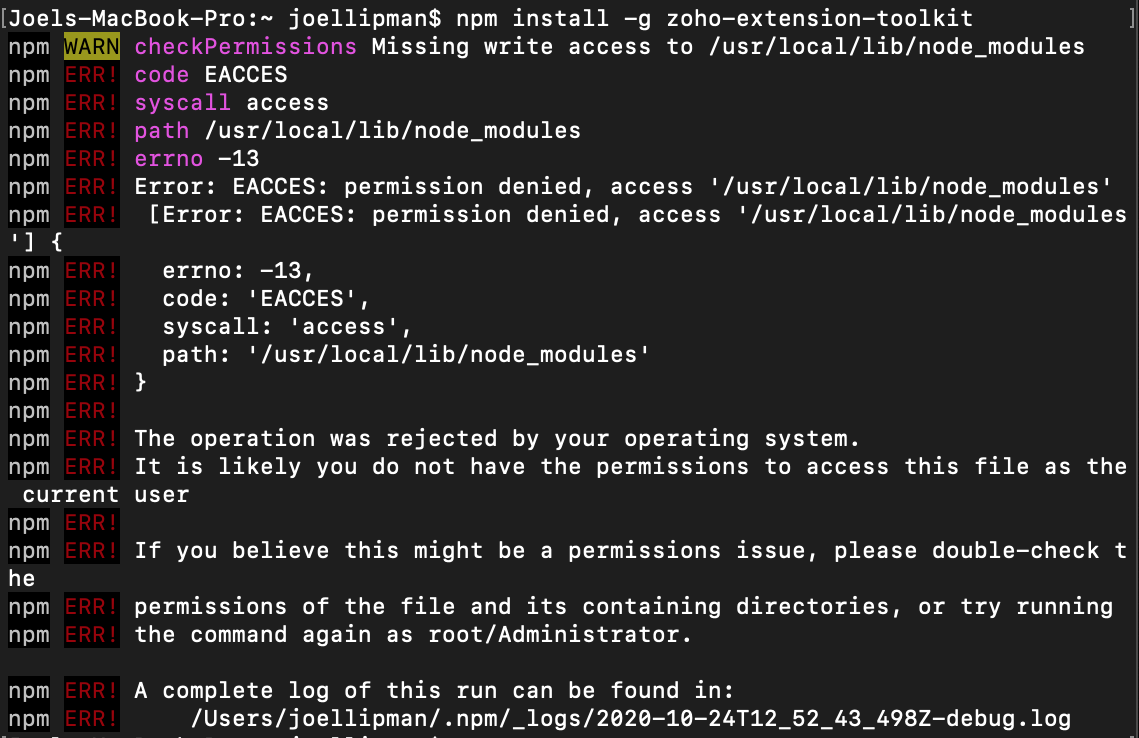 then type the following instead:
You should get prompted for the Mac/Admin password which you type in the terminal (will not display, just type away and press the Return key). The response will be something like “added 98 packages from 60 contributors in 3.043s”.
then type the following instead:
You should get prompted for the Mac/Admin password which you type in the terminal (will not display, just type away and press the Return key). The response will be something like “added 98 packages from 60 contributors in 3.043s”.

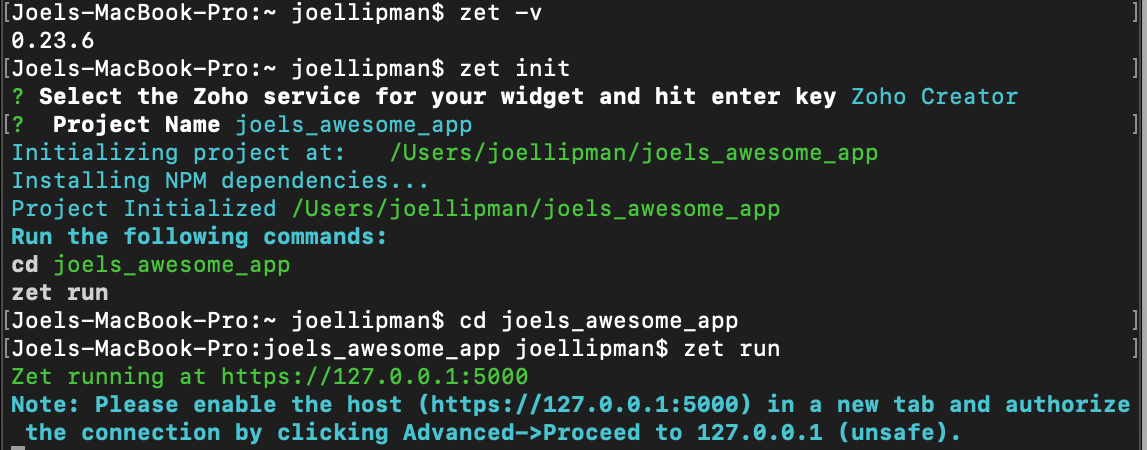
- Check the CLI installation by typing: This should return the version of the Zoho Extension Toolkit (eg. 0.23.6)
Create a project
- In the terminal, type
- You will be given a list of Zoho services, use the arrow up/down keys to select “Zoho Creator” and press the return/enter key.
- Give the project a name: eg. “joels_awesome_app” (without the double-quotes and no funny characters). It will initialize a project in a folder called something like “/Users/<your_username>/joels_awesome_app”
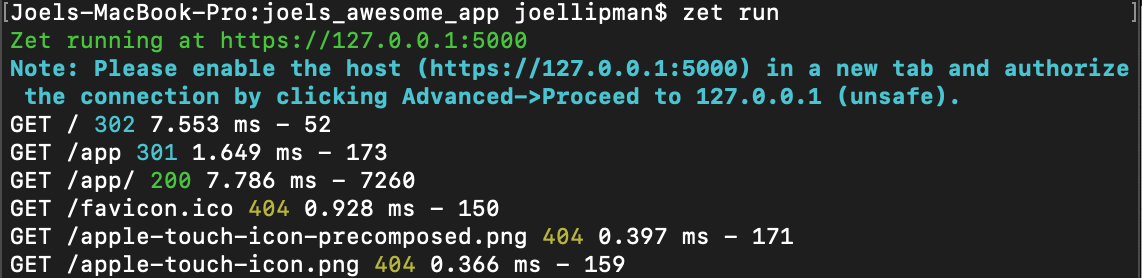
- It will then initialize some NPM dependencies and it will ask you to type the following commands; to change current directory to the app directory and then to run the toolkit The terminal response will advise that it is running zet at https://127.0.0.1:5000 along with the instructions “please enable the host (https://127.0.0.1:5000) in a new tab and authorize the connection by clicking Advanced -> Proceed to 127.0.0.1 (unsafe)”.
- Open a browser and Ensure you type the preceding “https” rather than the default “http”
- [Optional Step] This is an added note/step if you get the following error when trying to access your app on your localhost:
“127.0.0.1 normally uses encryption to protect your information. When Google Chrome tried to connect to 127.0.0.1 this time, the website sent back unusual and incorrect credentials. This may happen when an attacker is trying to pretend to be 127.0.0.1, or a Wi-Fi sign-in screen has interrupted the connection. Your information is still secure because Google Chrome stopped the connection before any data was exchanged. You cannot visit 127.0.0.1 at the moment because the website sent scrambled credentials that Google Chrome cannot process. Network errors and attacks are usually temporary, so this page will probably work later.”
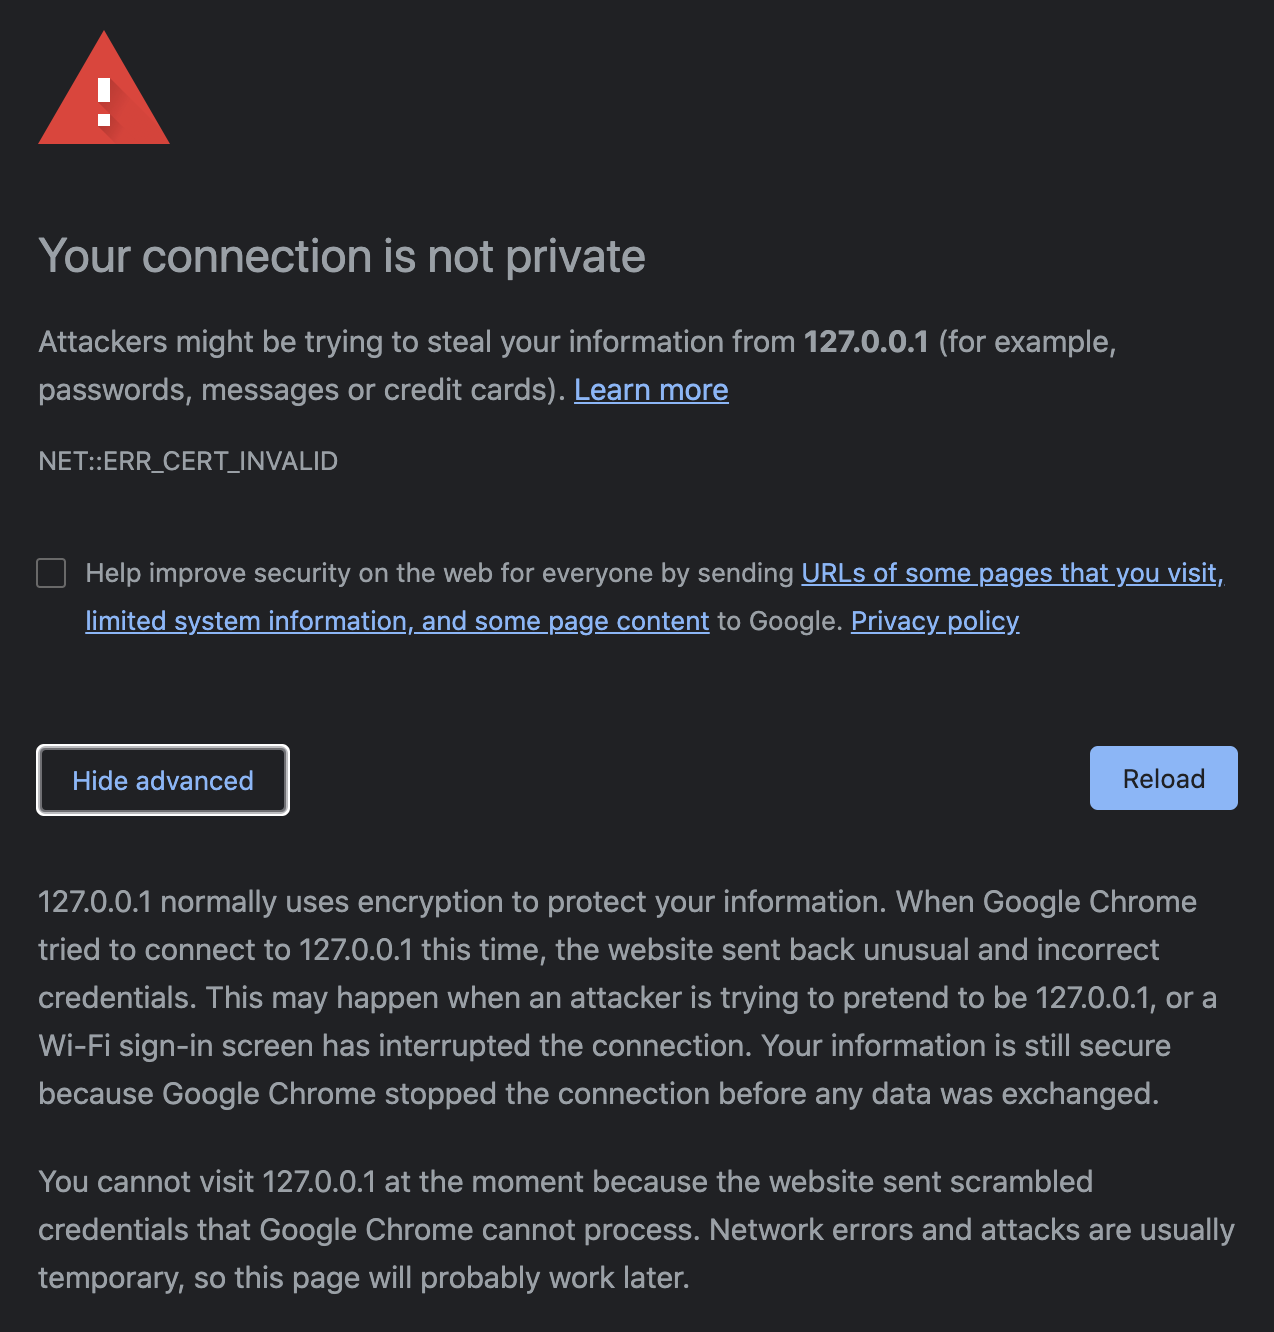
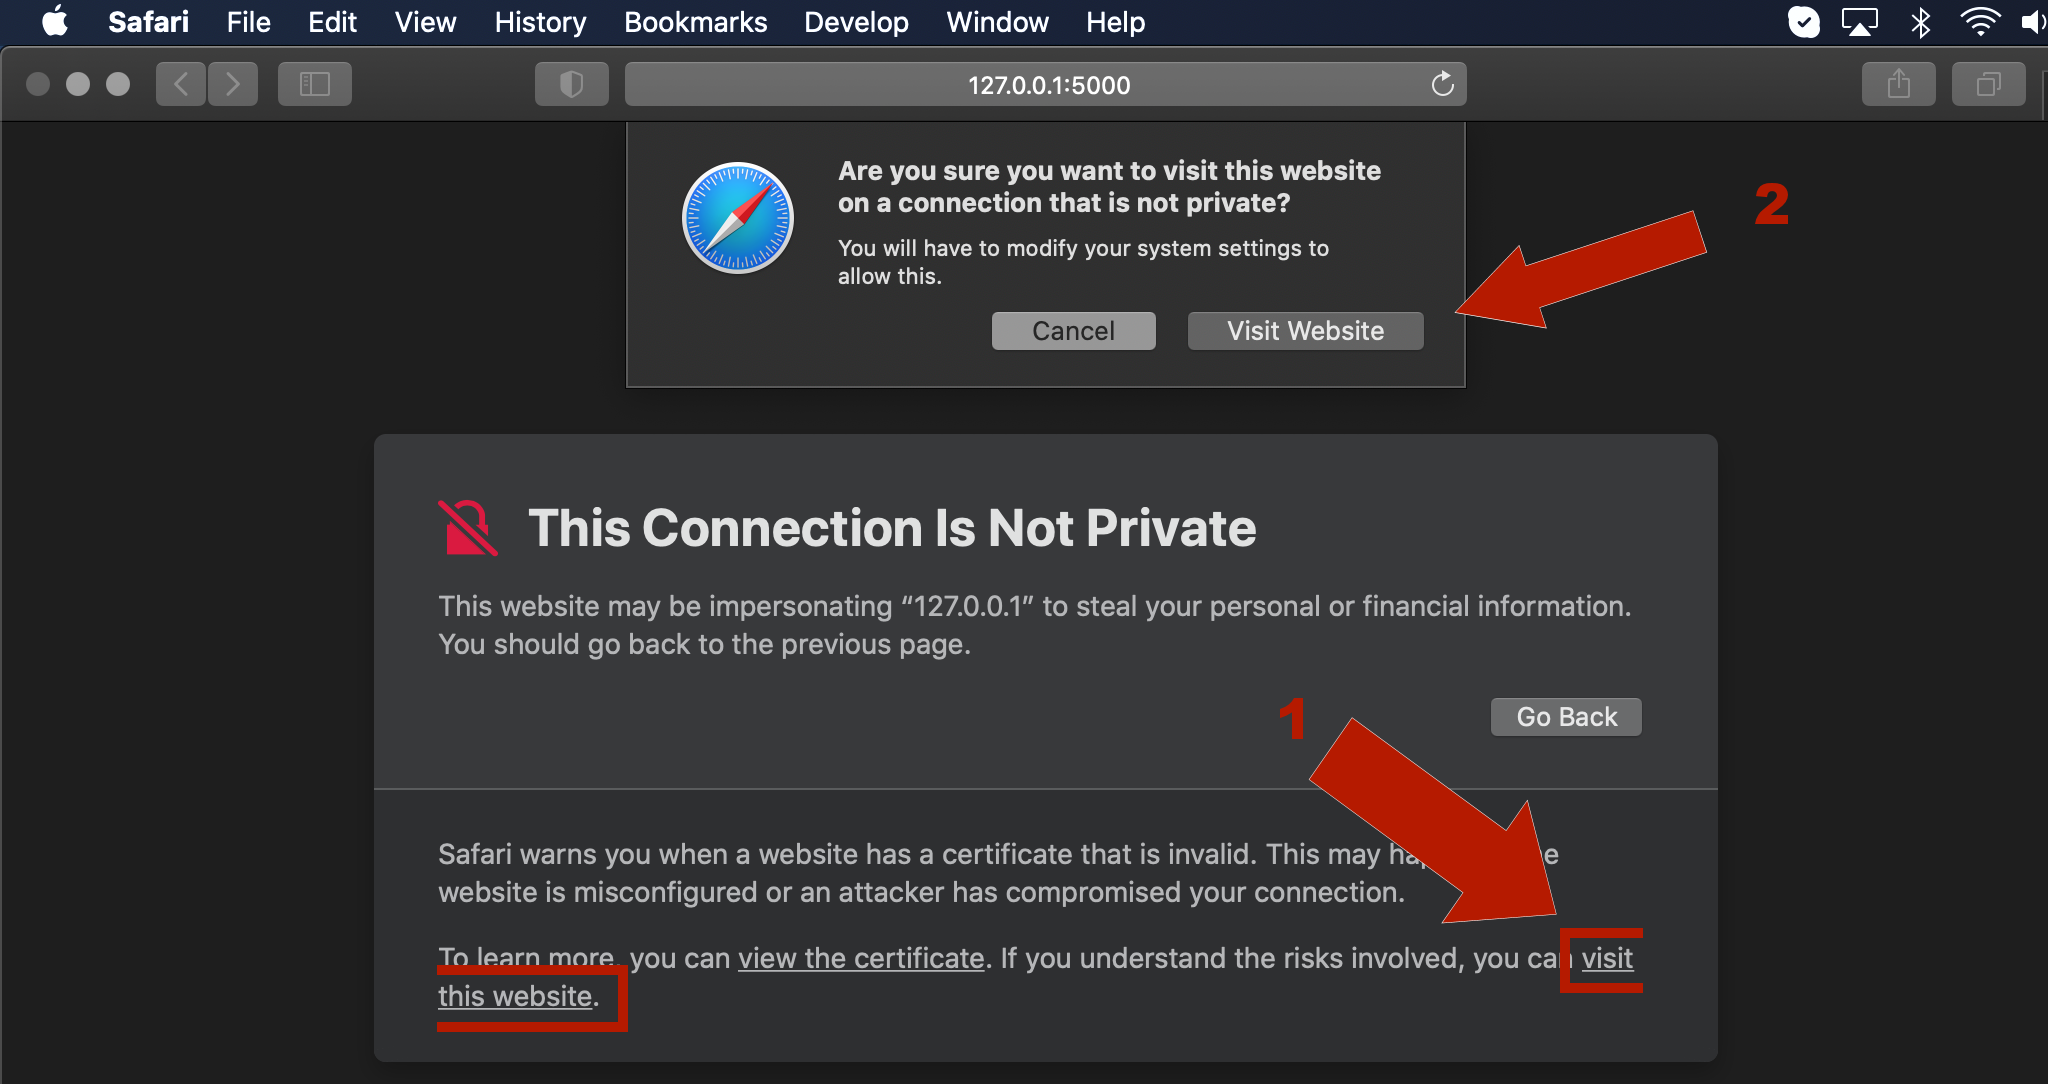
My workaround was simply not to use Google Chrome but to open the Safari app instead (ensure you type the https://127.0.0.1:5000 as the URL as it may default to use HTTP instead of HTTPS):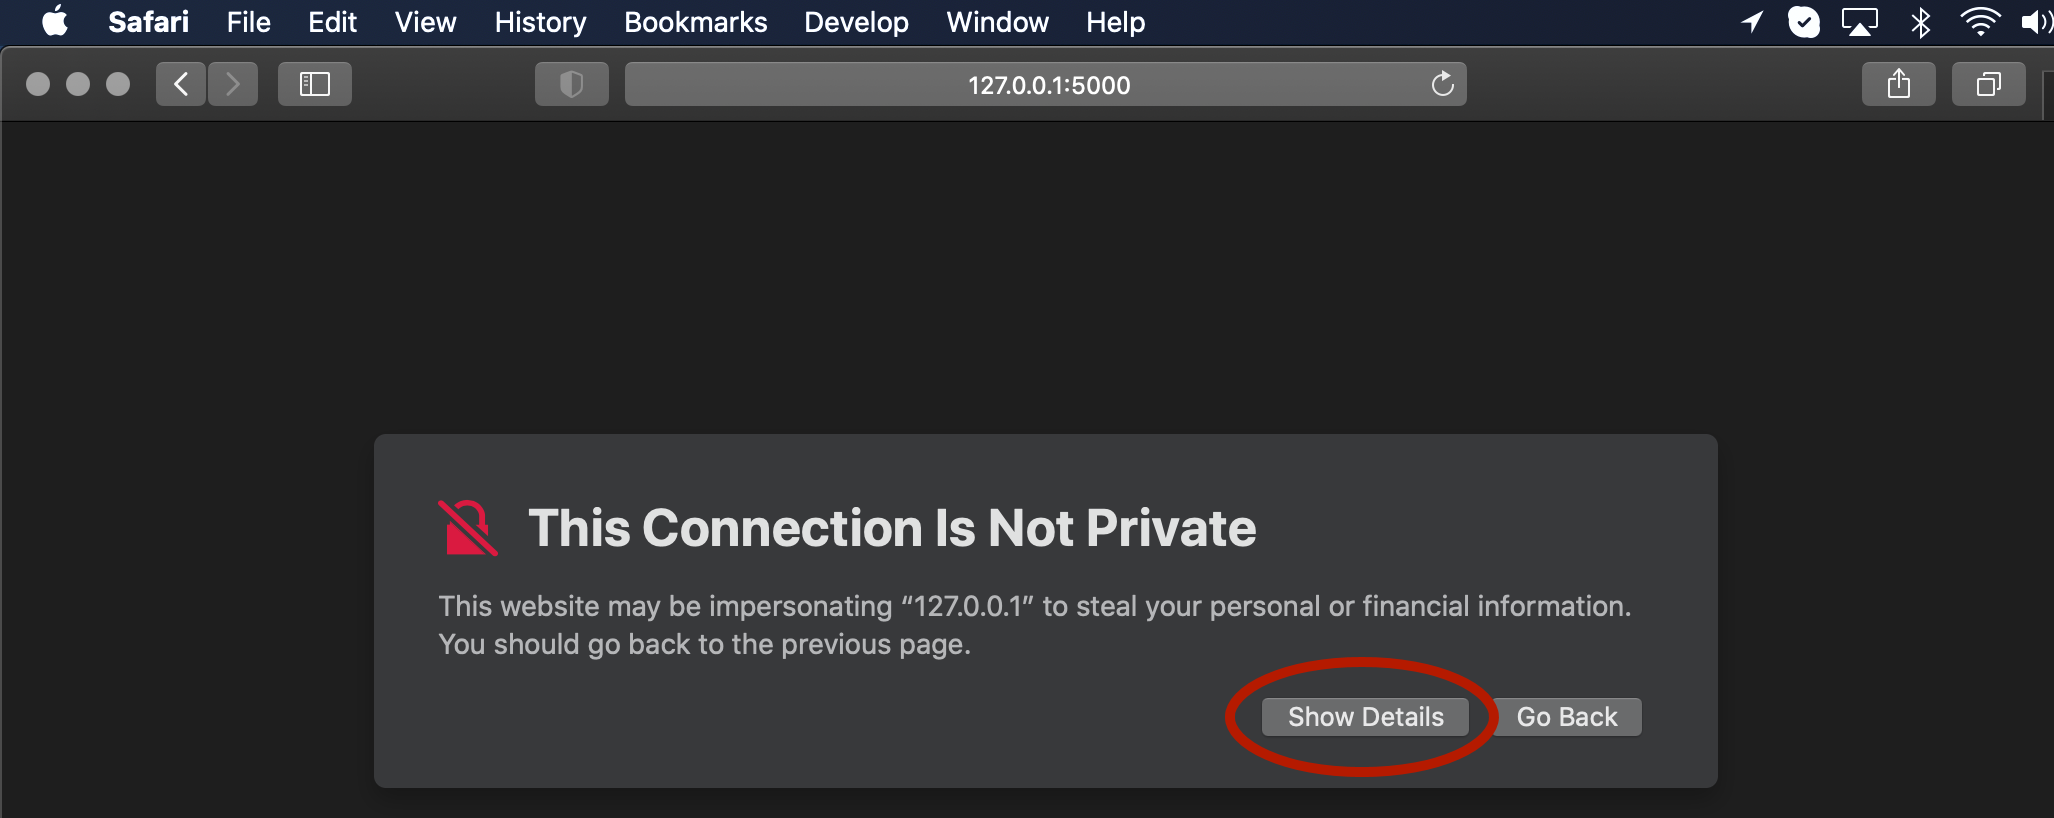 Again you may get a warning but simply click on “Show Details” then on “Visit this website” then on “Visit Website” (on yet another popup) and then finally enter your password to make changes to your Certificate Trust Settings:
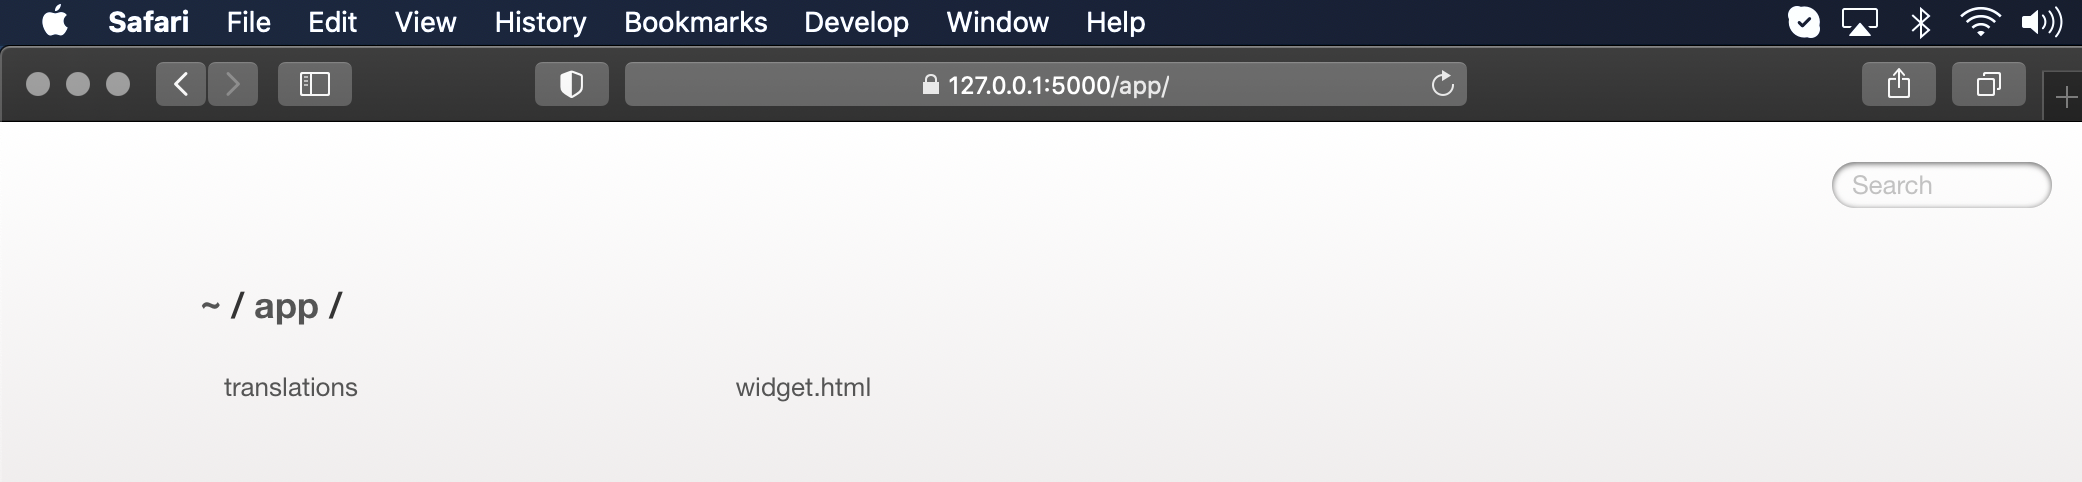
- You should get the following page open in your browser which is the root folder of your app:
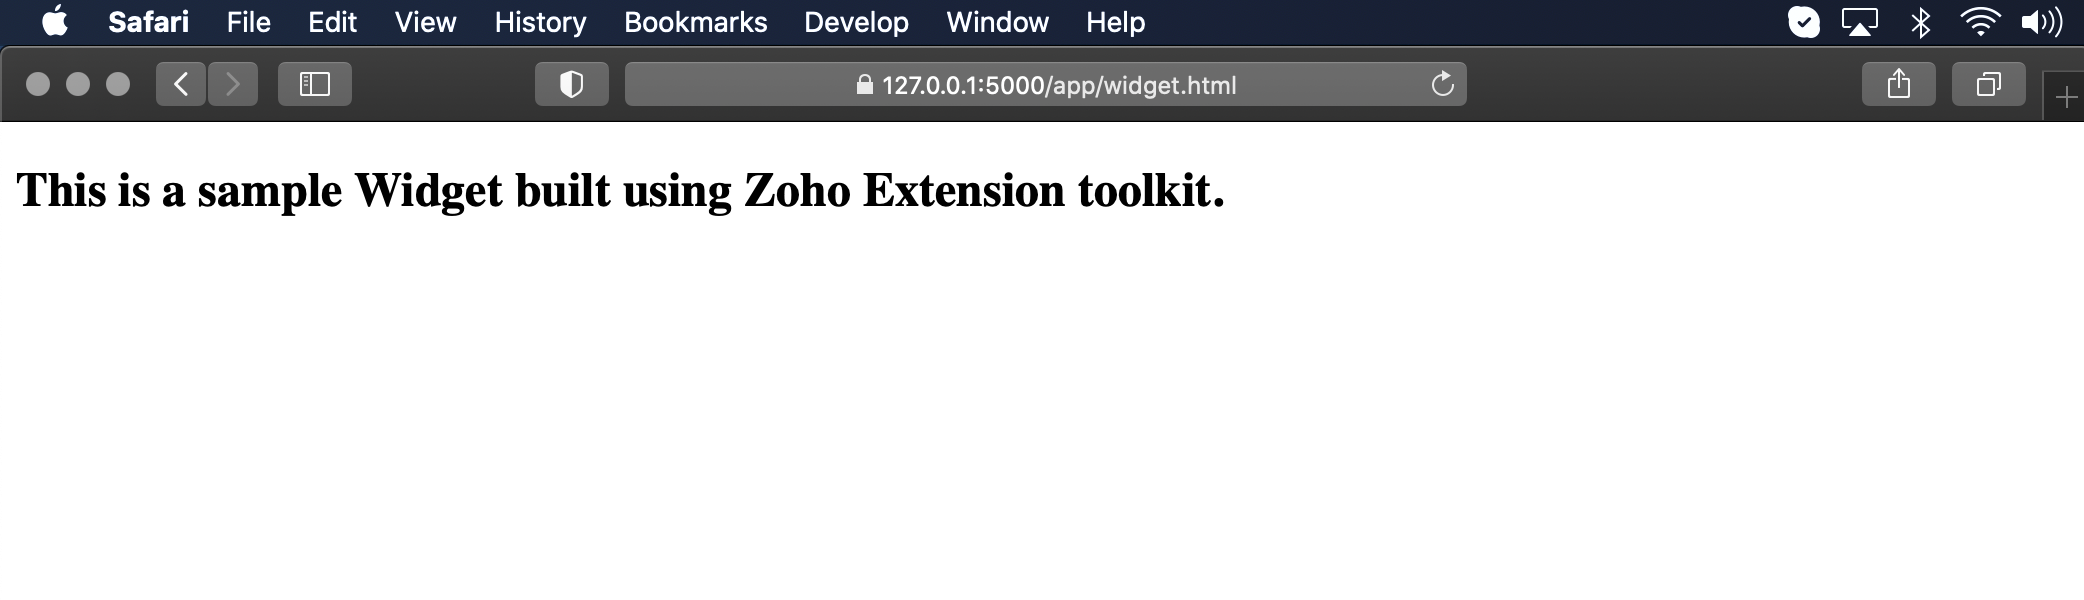
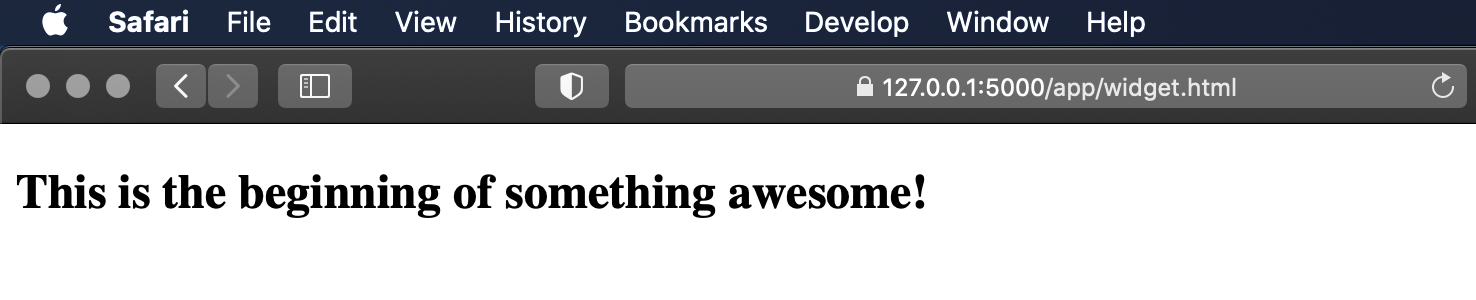
- In the browser url, type https://127.0.0.1:5000/app/widget.html, your browser page should now display something similar to the following:
- Note that for every action you are doing in the Safari browser, there will be a log in the terminal:
 This message is somewhat out of date but follow the following instructions to preview your app:
Editing the Widget
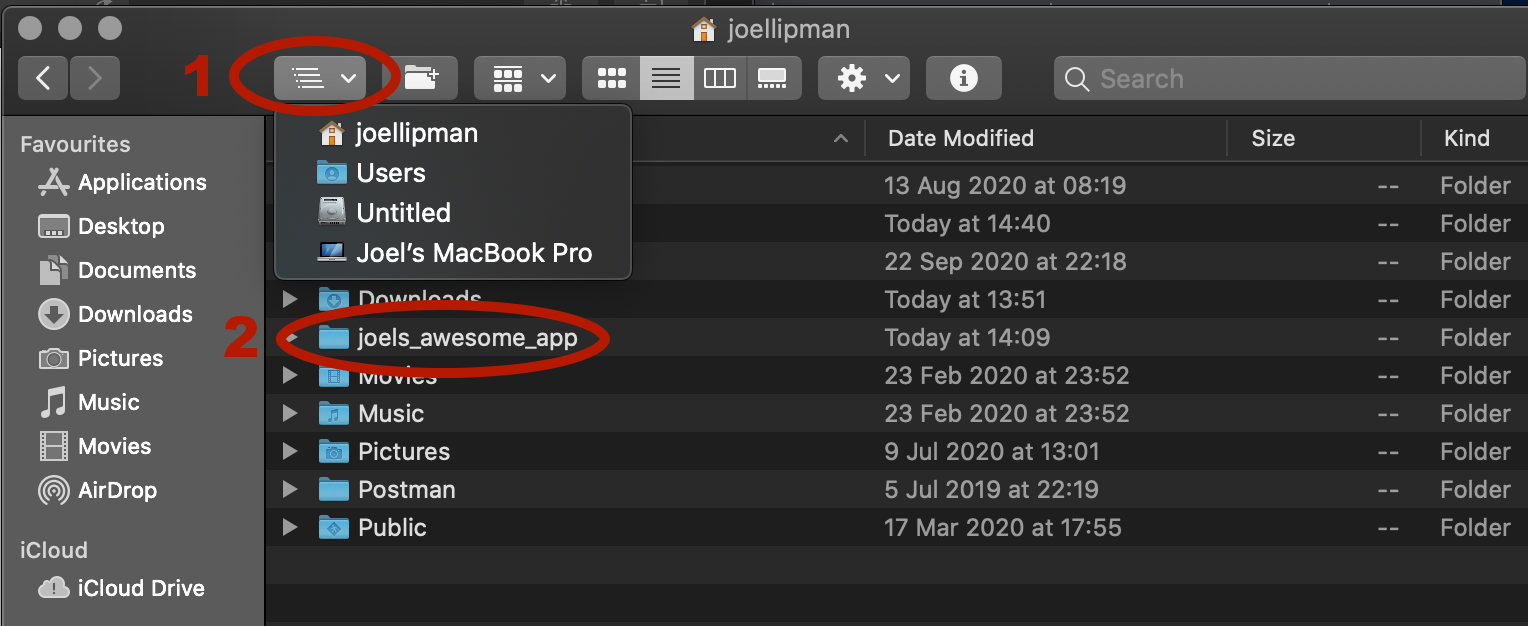
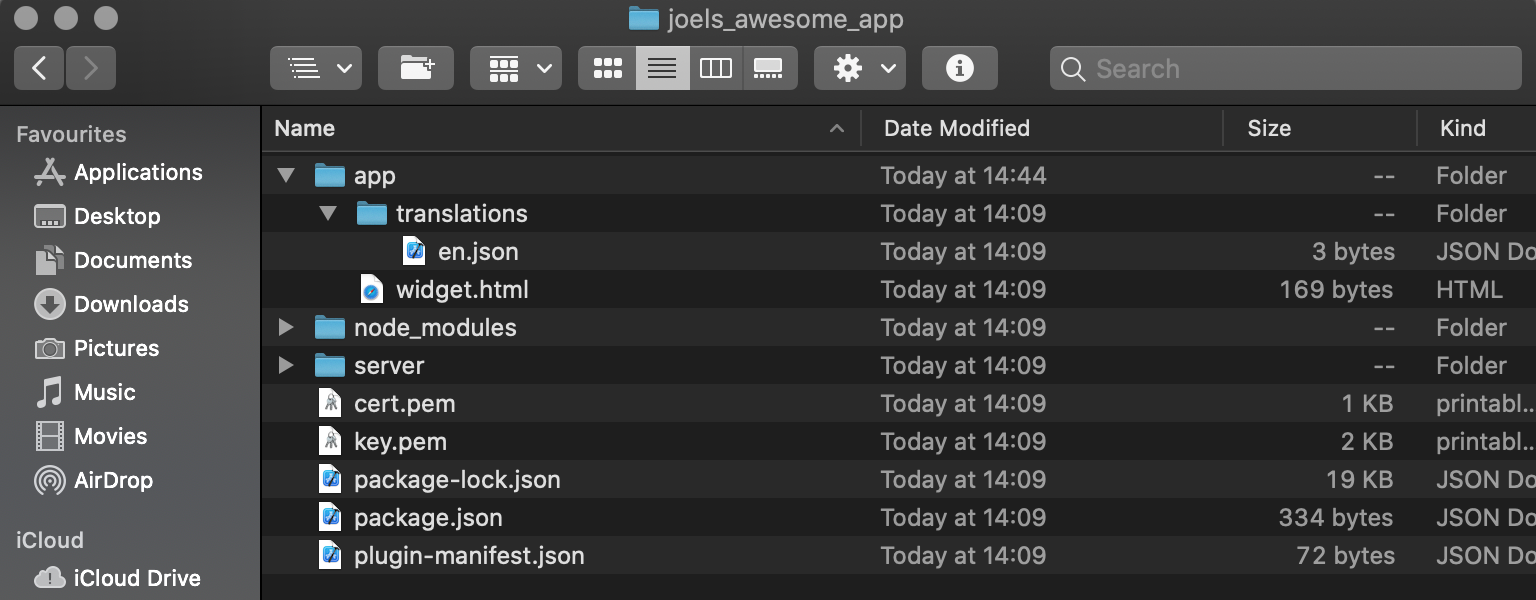
- So let’s modify the widget.html file in this app by opening a finder/file explorer window and browsing to the app folder:
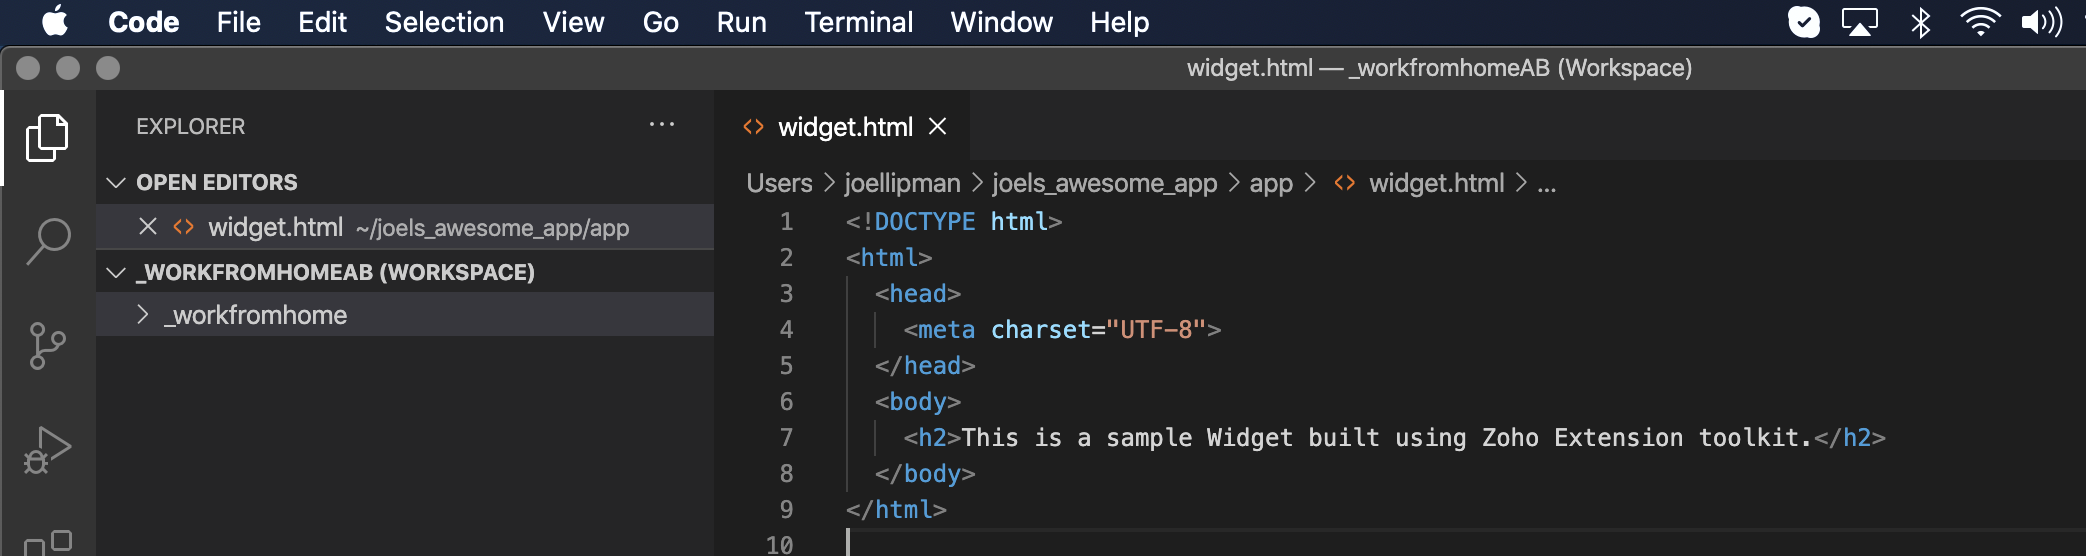
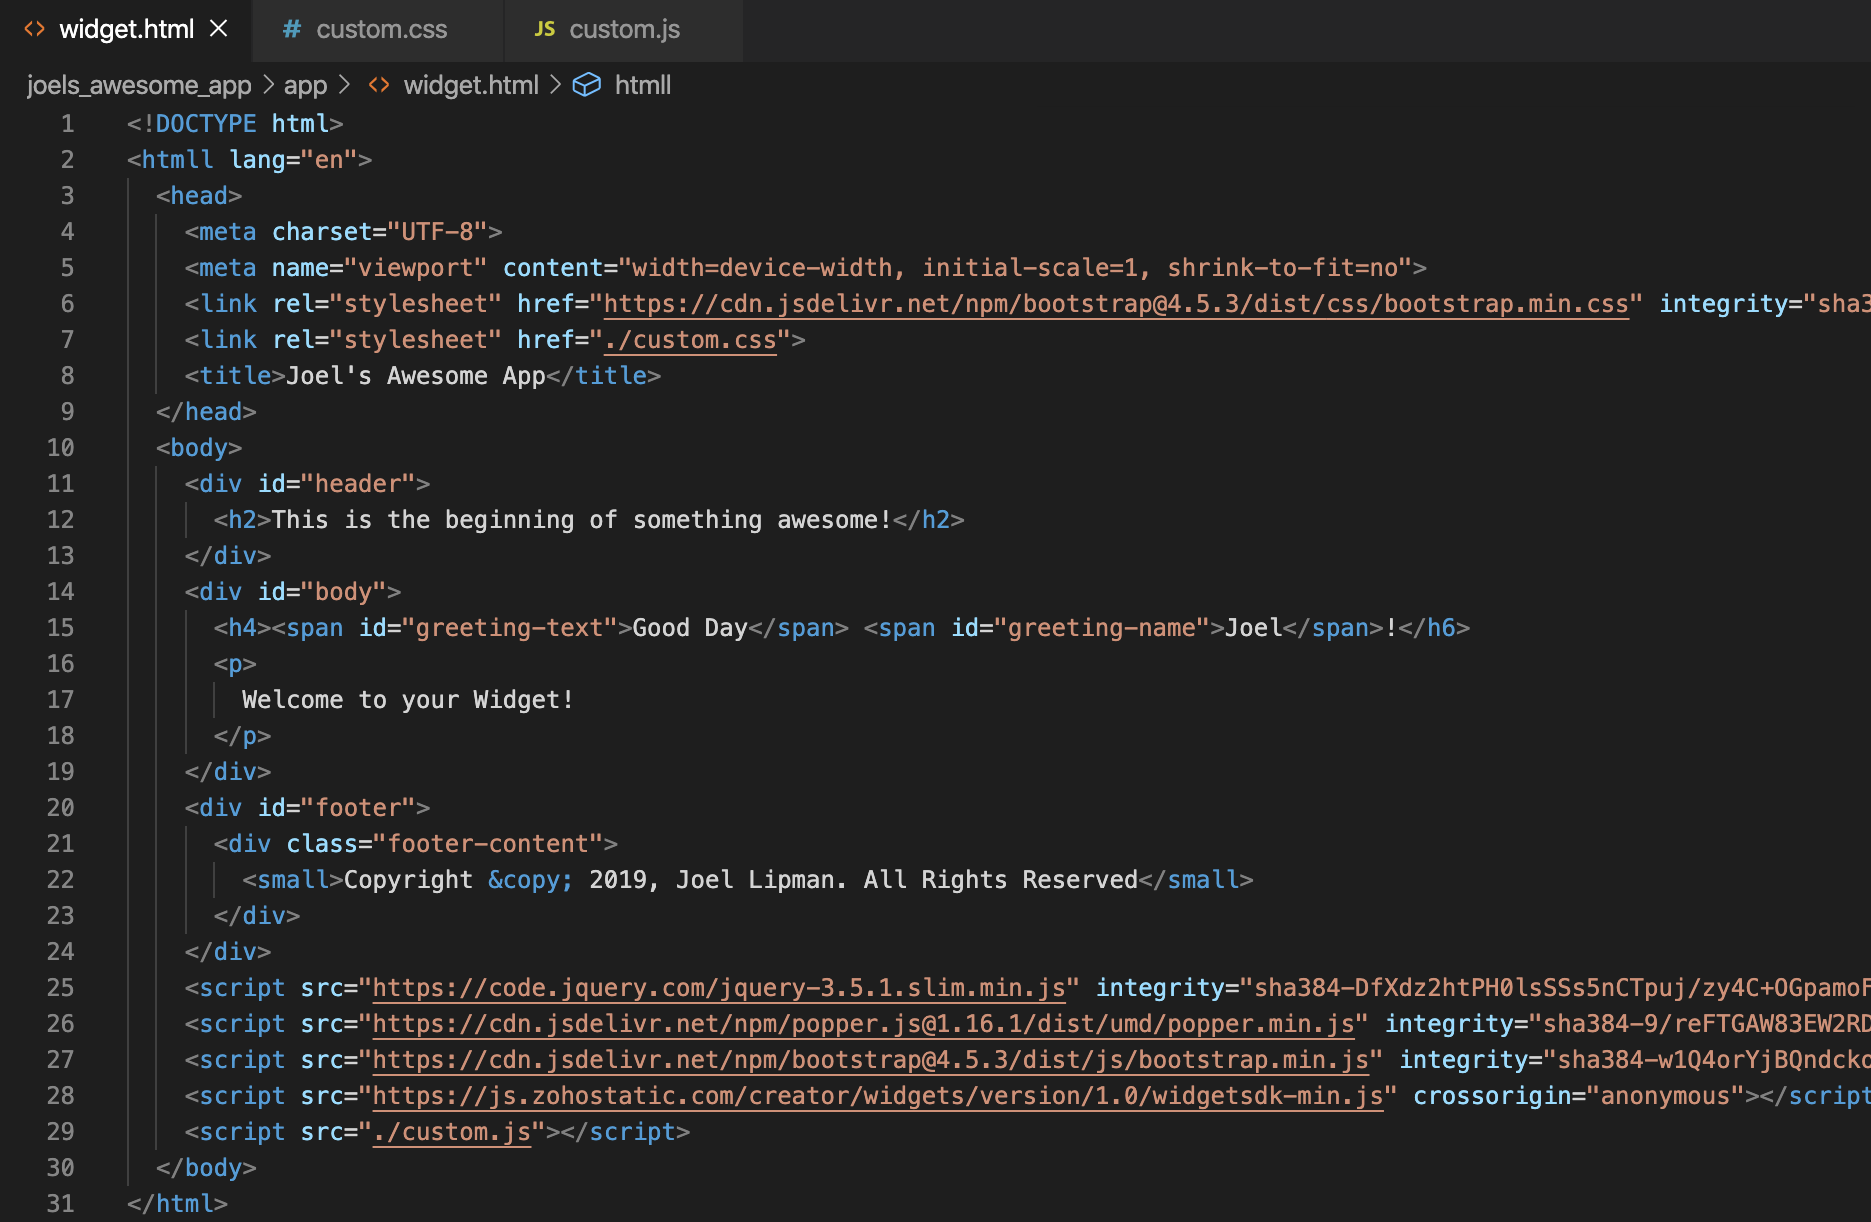
- Then open the file “widget.html” in your favorite code editor, here I am using MS Visual Studio Code for Mac and I get the following:
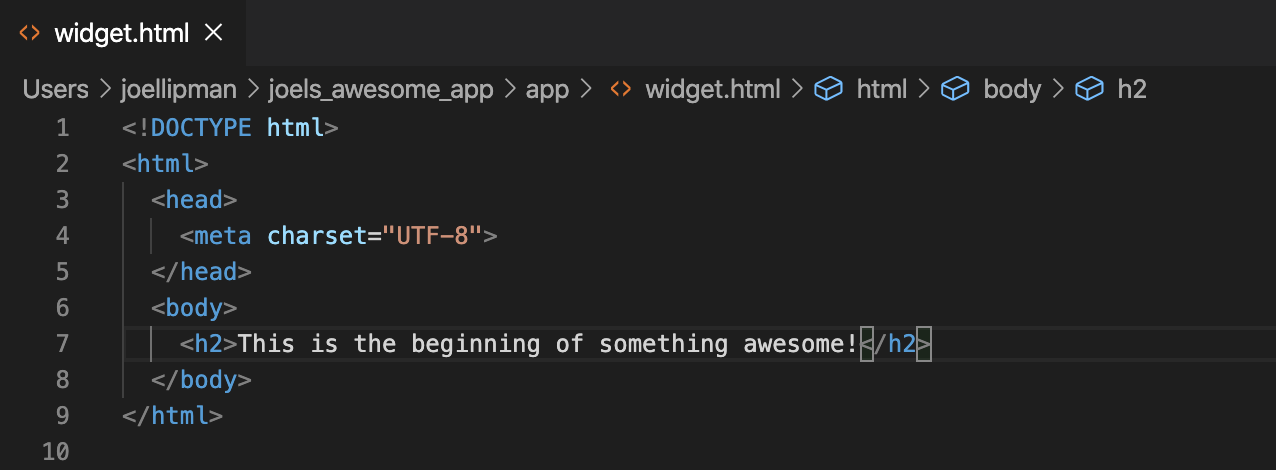
- If I change the HTML and save the file, I can refresh the browser page and immediately see the changes:
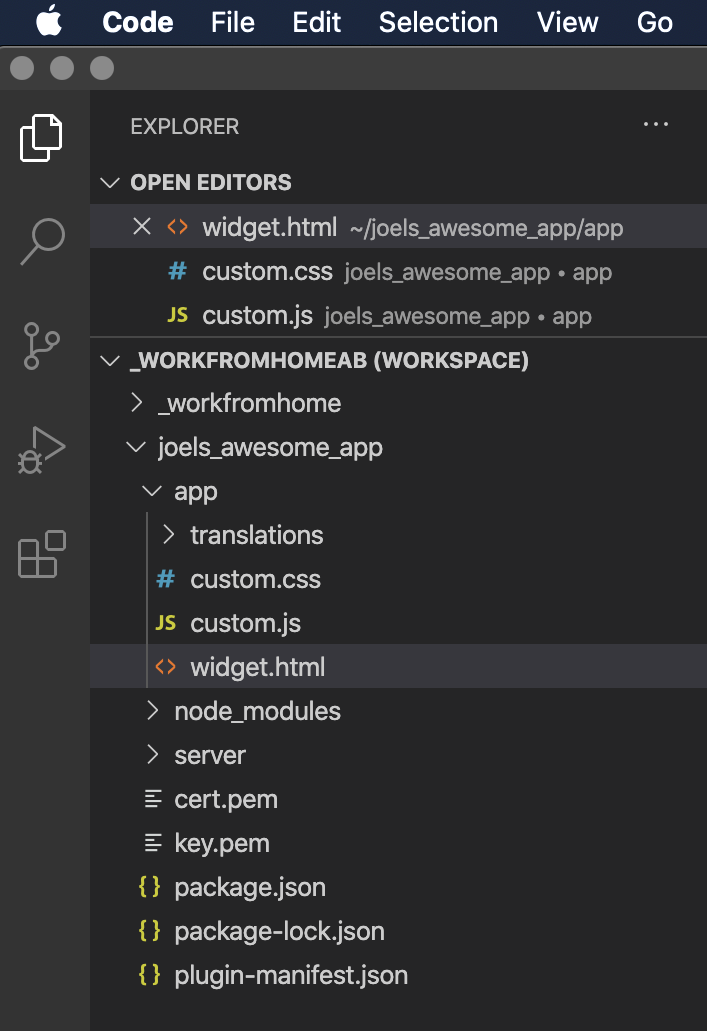
- Adding custom CSS and JS files: If using MS Visual Studio Code, I’m adding the app folder to my workspace so that I can easily create a stylesheet and javascript file specific to this app:
- Adding third-party frameworks: I’m going to use my favorite third-party extensions (Bootstrap & jQuery) which I’m referring to over the web (Content Delivery Network – CDN)
Recap
So as a recap, this is how it looks so far:
- The HTML:
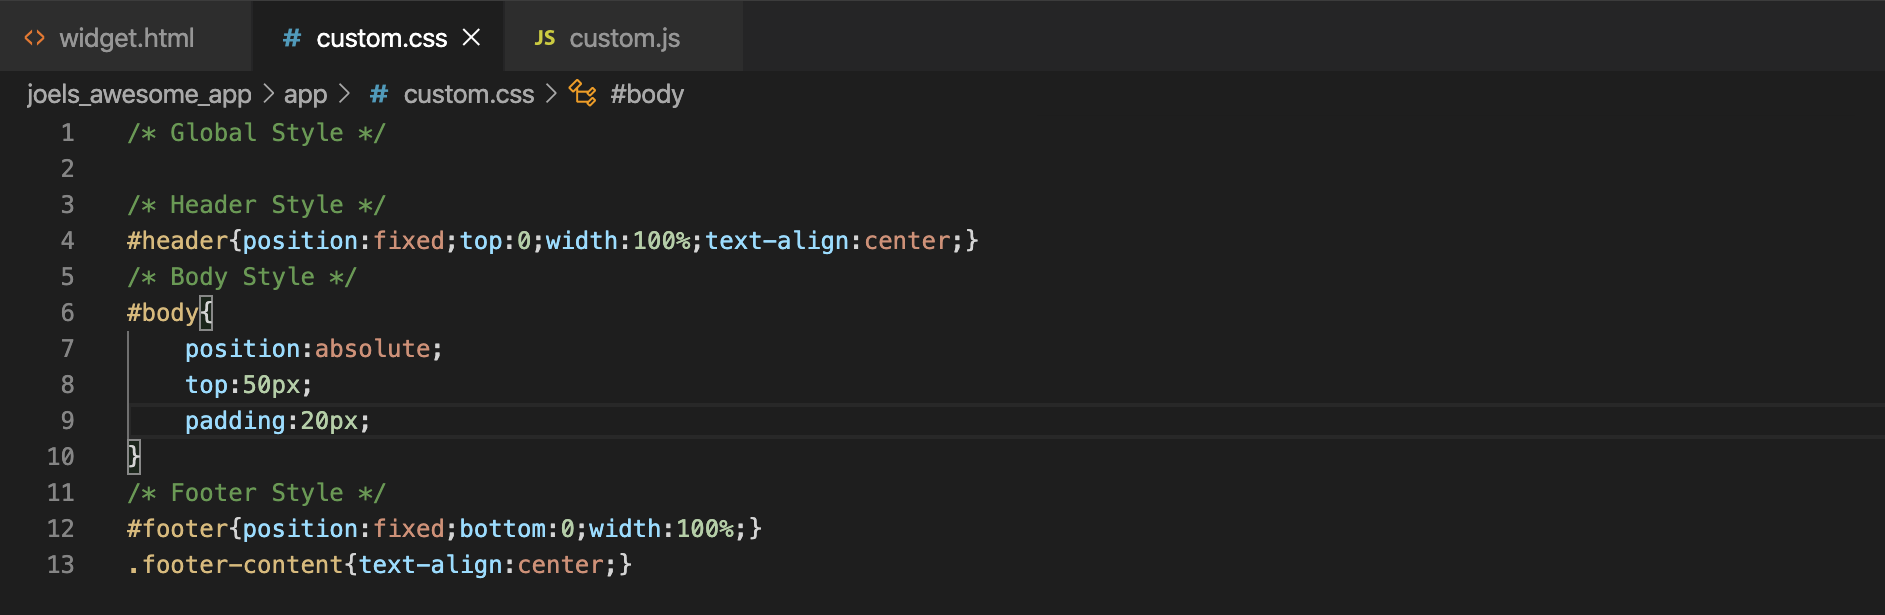
- The CSS:
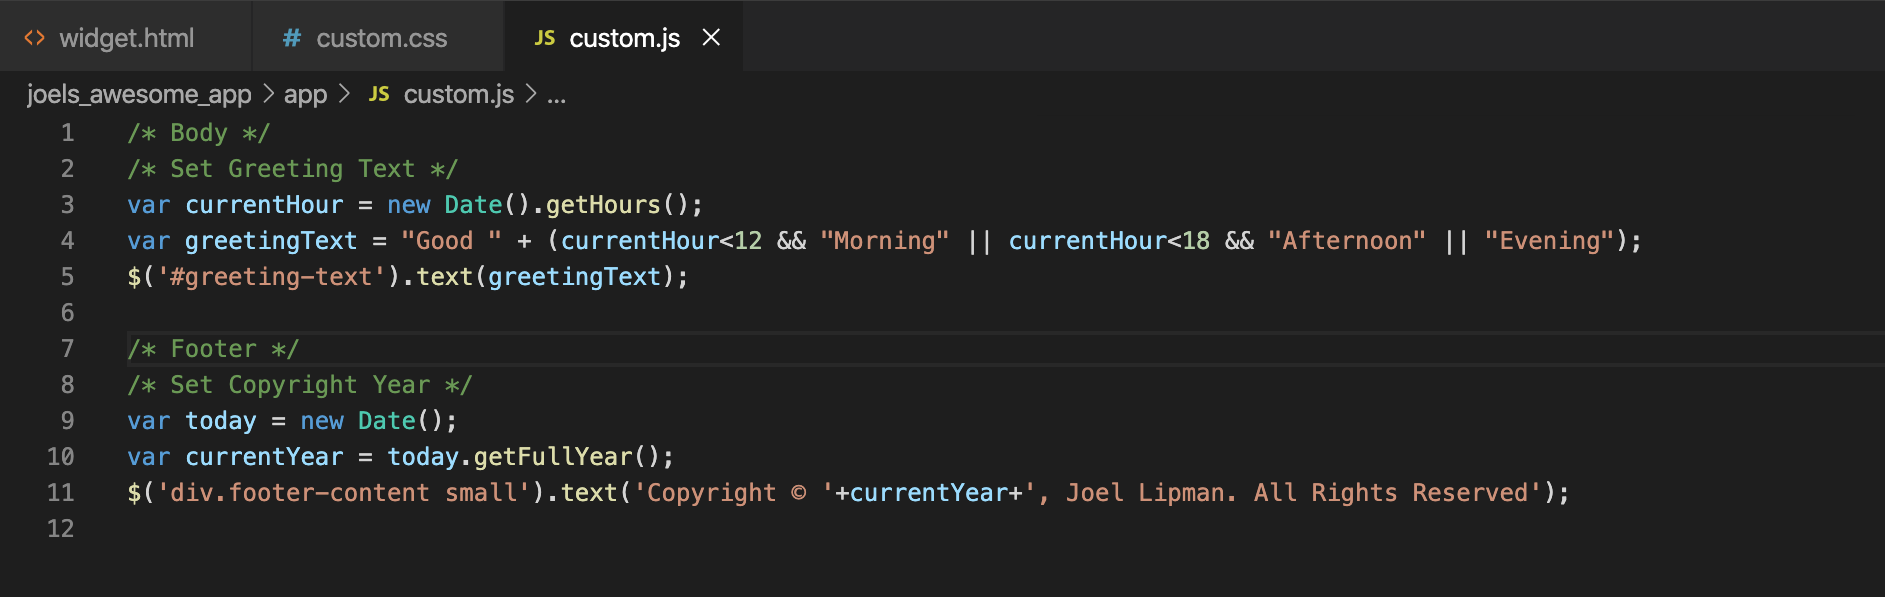
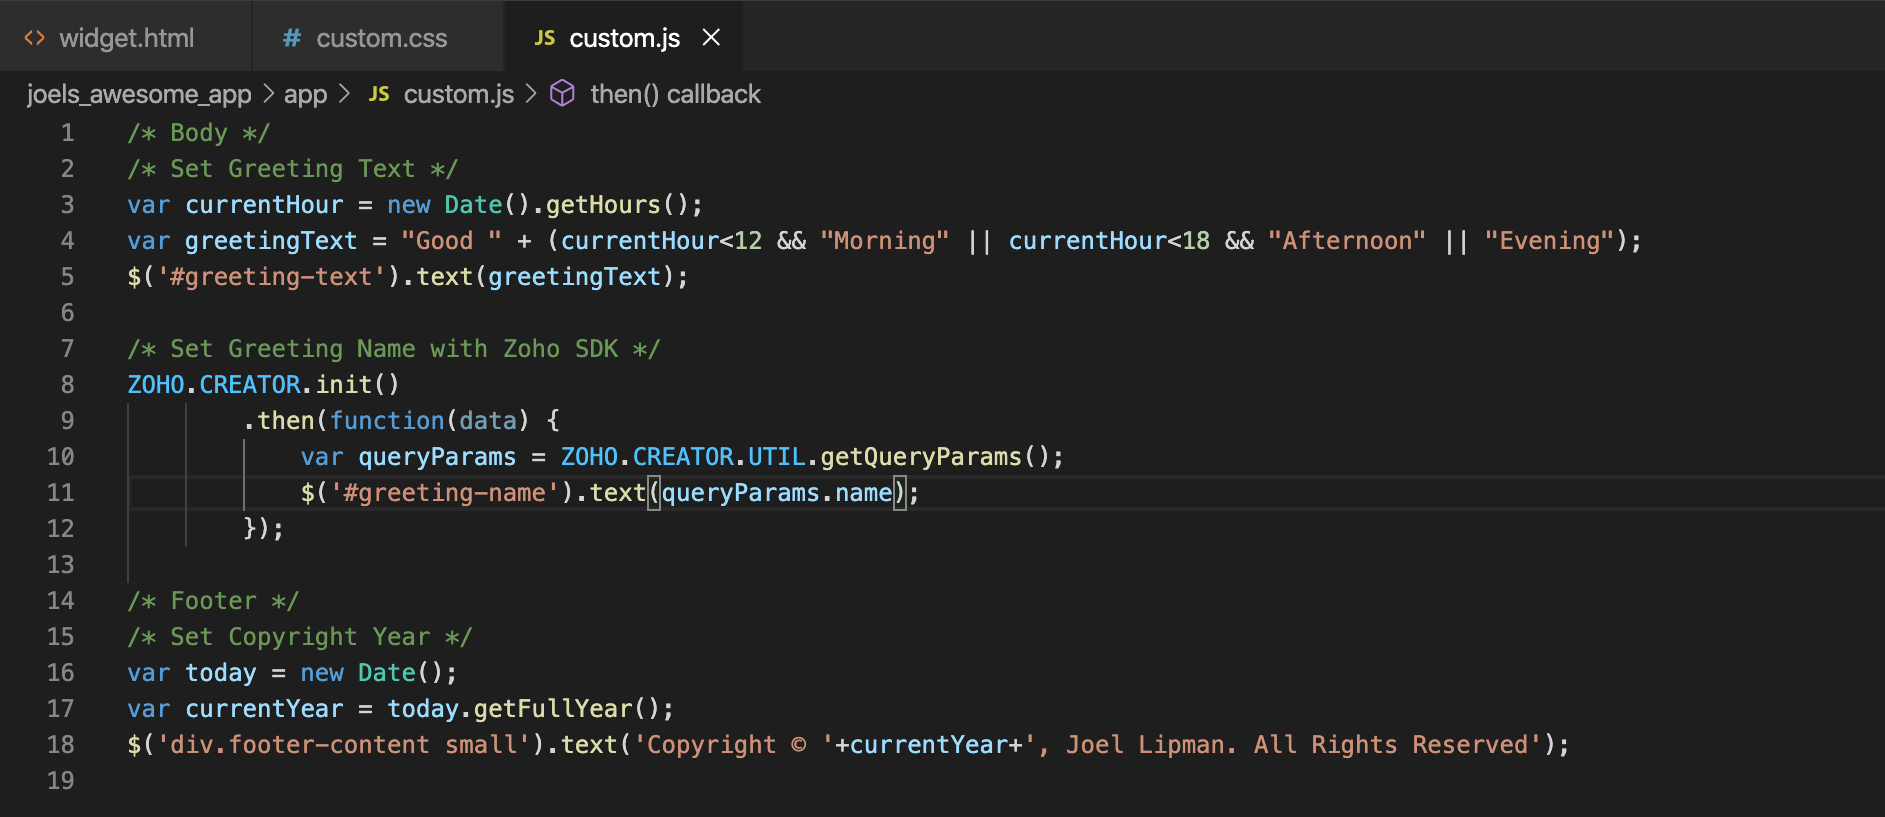
- The JavaScript:
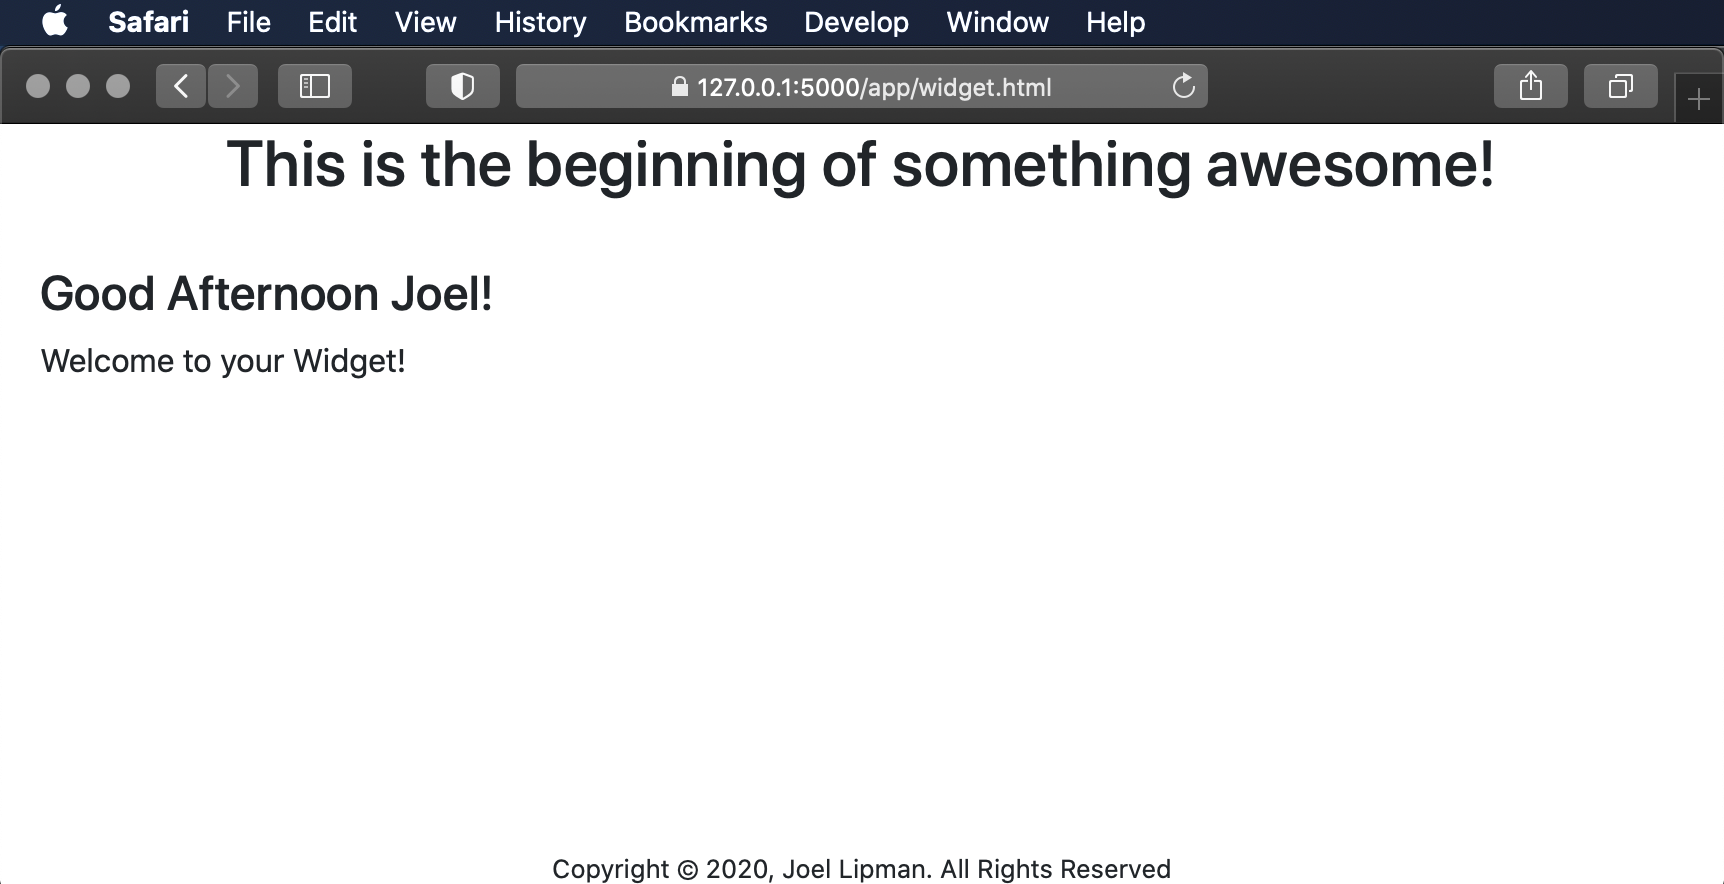
- The Preview in Browser:
Adding some Zoho SDK functionality:
- First I’m going to add the Zoho Javascript to the page
Packaging the Widget
- Return to the terminal and hold down the CTRL key and press C to interrupt the logging terminal and return to the prompt. (your safari browser can not display this page anymore)
- Type:
- You should get a response saying that Validation Rules passed successfully. Now Type:
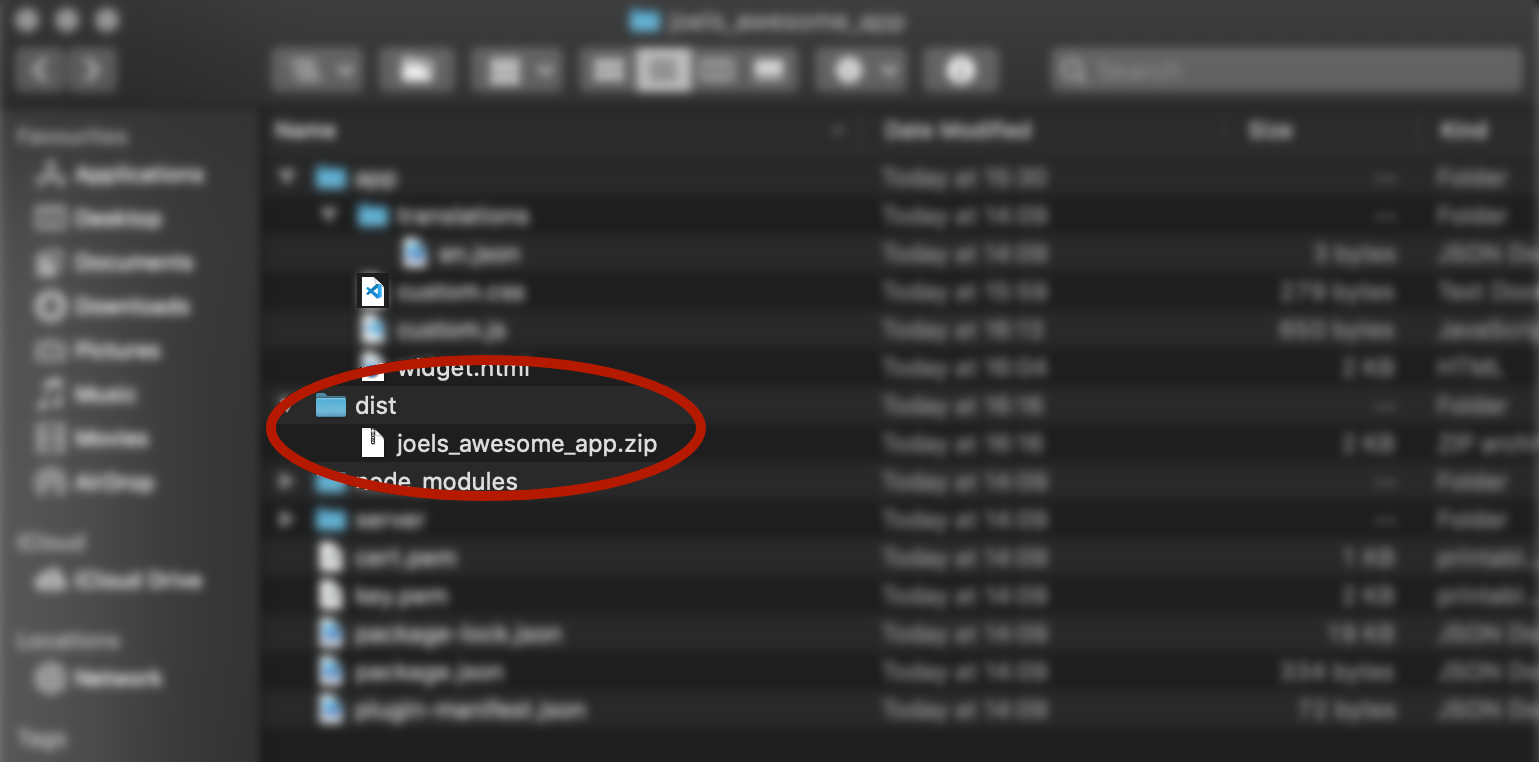
- You should get a response saying something like “Extension packed successfully as … in dist folder”:

- Return to your finder/file explorer window and a “dist” folder should have appeared containing a ZIP file:
Adding your Widget in Creator
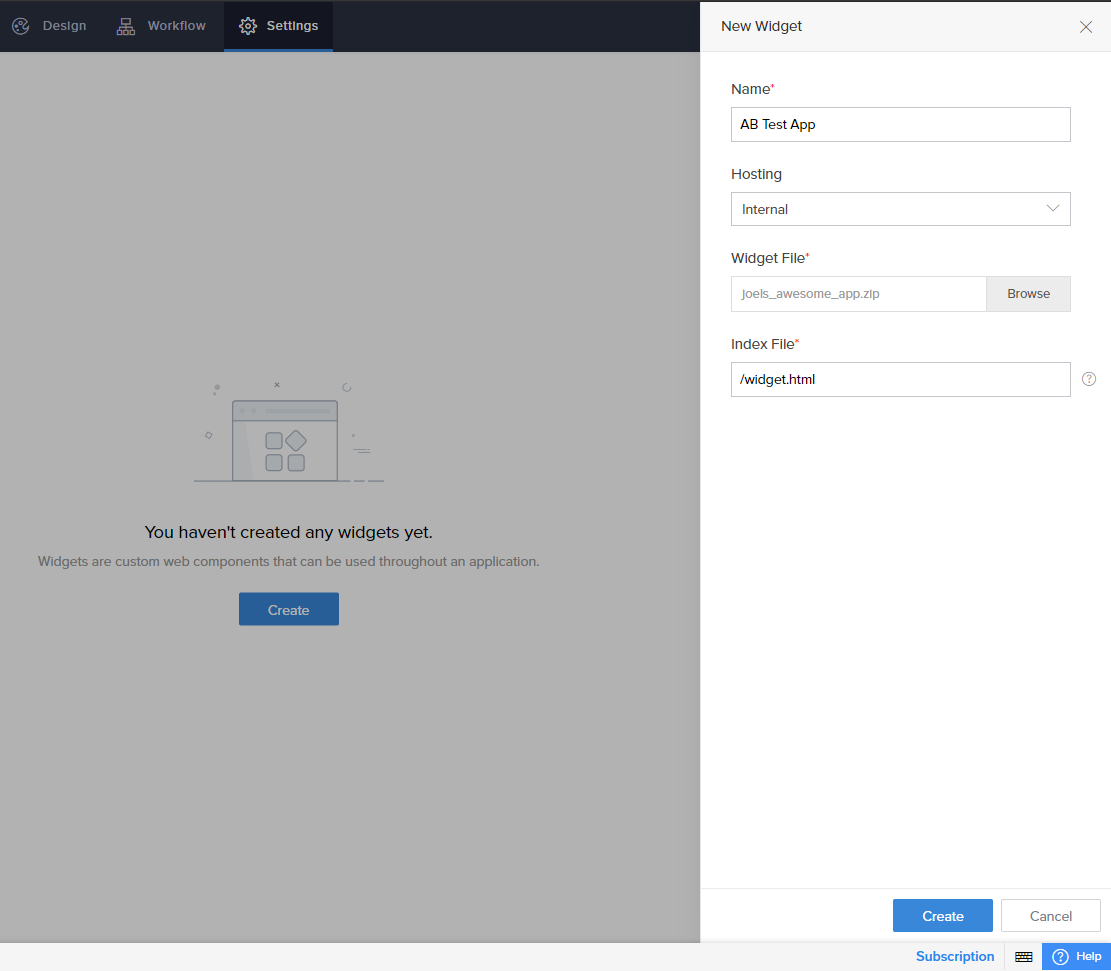
- Now return to your Creator app, go to Settings and then Widgets then click on "Create" or “New Widget” and enter the details of your widget:
- Name: to whatever you want
- Hosting: I select “Internal” though the benefits of “External” could be for development updates (untested).
- Widget File: upload the ZIP file from your dist folder.
- Index File: put here the root html file along with the path (do not forget the leading slash or your widget will error)
- Click on "Create" (bottom-right of your screen)
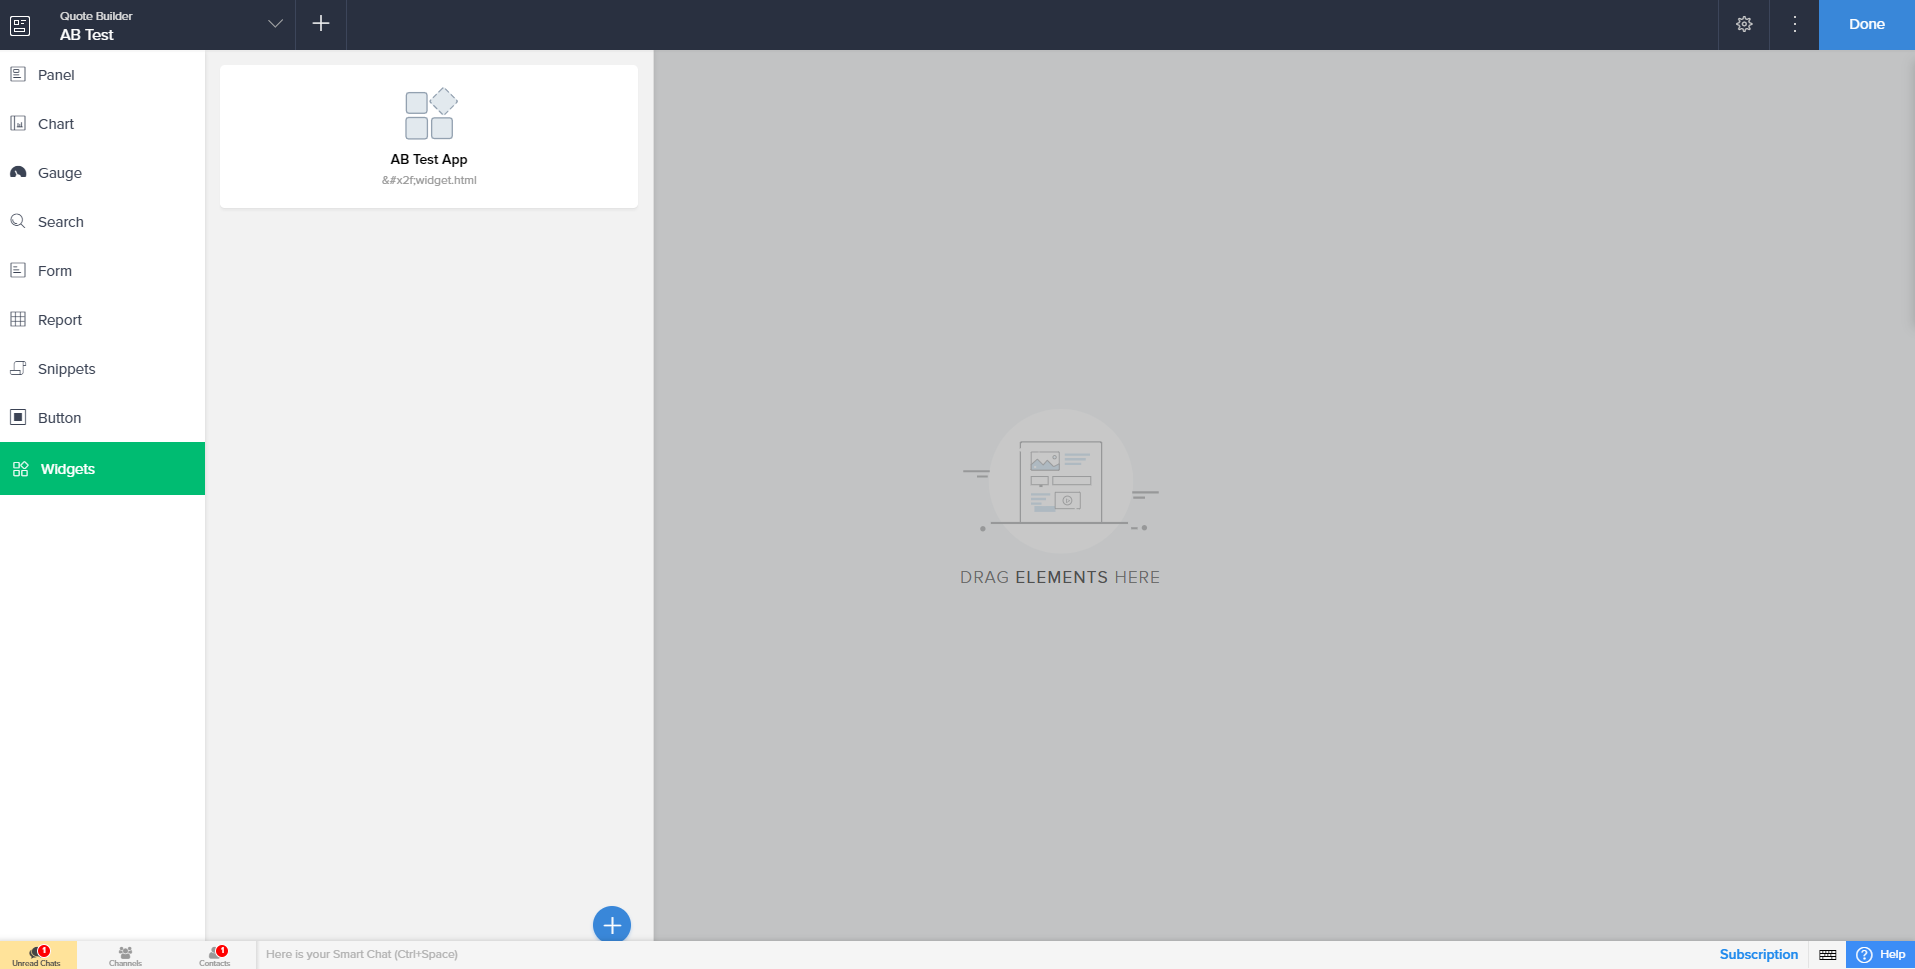
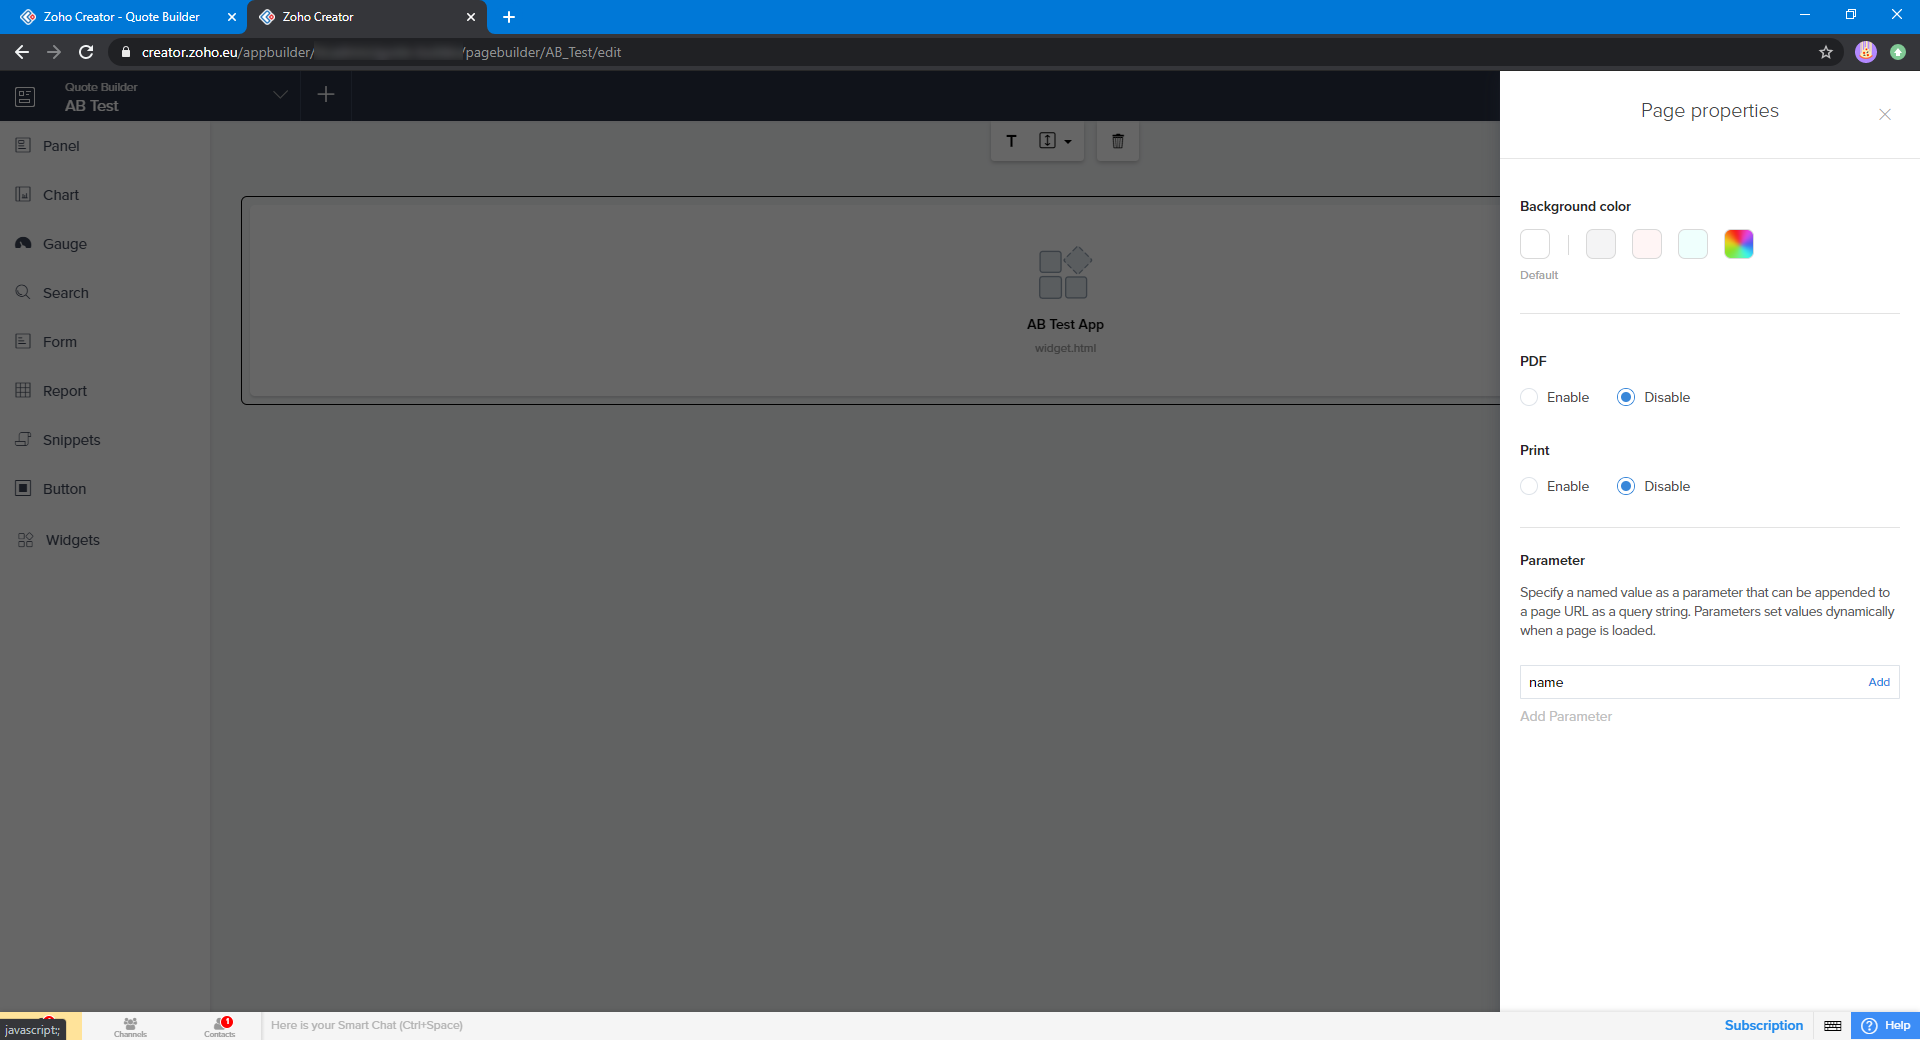
- Now go to a Creator page (new or existing), select "Widgets" and drag your new Widget to the page:
- Don't forget to click on the page settings (cog in the top right) and add a parameter, in this case "name":
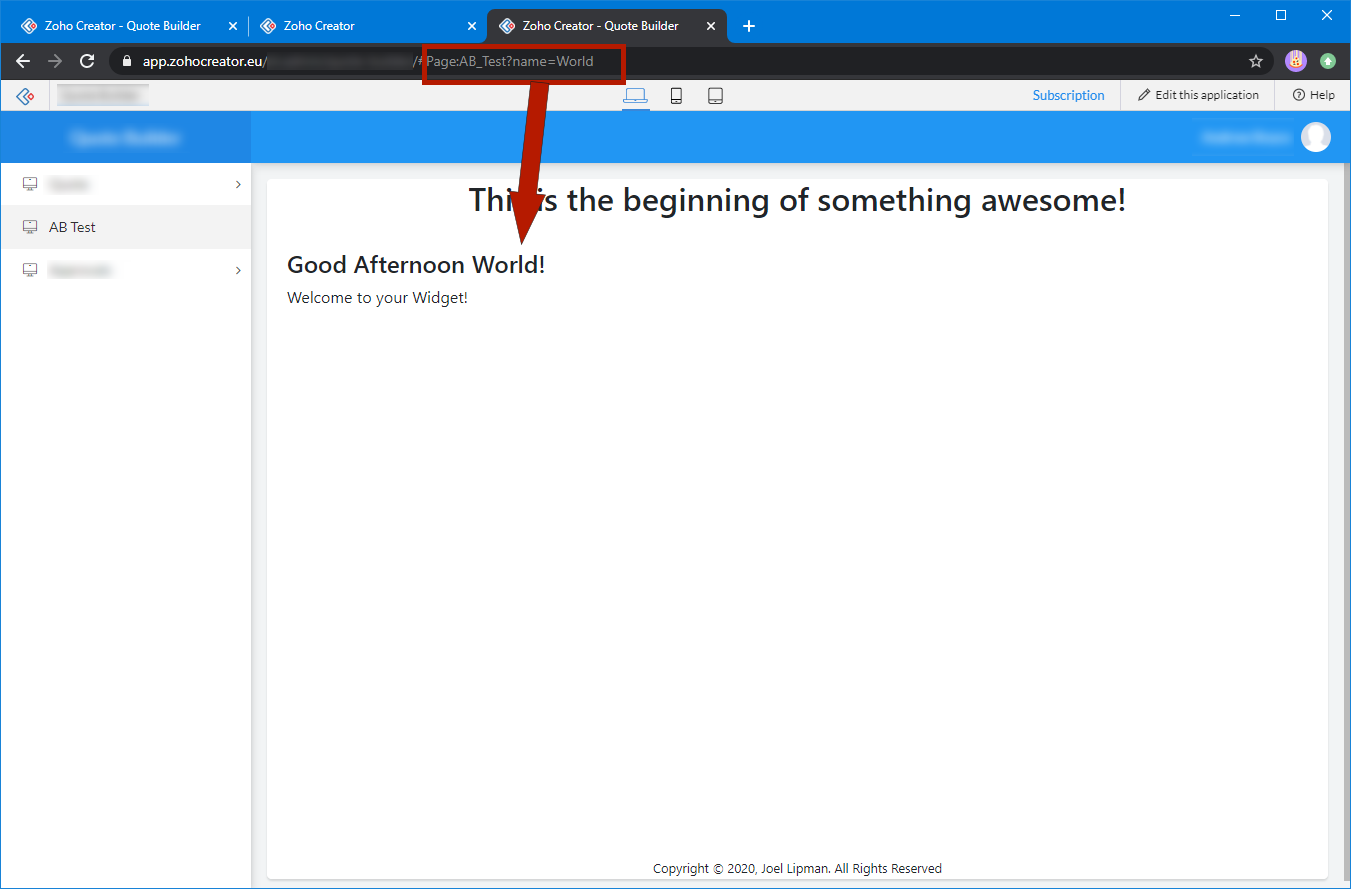
- Great! Now access this application and preview your masterpiece! The following screenshot shows what happens when I change the parameter:
Additional Note(s):
I have found that adapting Widgets created for Zoho Creator to work in Zoho CRM is pretty easy to do. The only differences are the step where you select the type of project in the CLI, in particular the widget JS script that is referred to in widget.html and secondly, the way you retrieve records in the Zoho JavaScript. If you do not include Zoho queries, then I have found the app can be ported between either Creator or CRM (as in pure HTML,CSS and JS).
Files referring to Creator specifically:
- ./app/widget.html: reference to script src at https://js.zohostatic.com/creator/widgets/version/1.0/widgetsdk-min-js
- ./app/custom.js: my custom javascript file referring to the ZOHO.CREATOR.init() and calling Creator records.
- ./plugin-manifest.json: JSON specifying service as "CREATOR".
- When trying npm install -g zoho-extension-toolkit: Error: EACCES: peermission denied Run sudo npm install -g zoho-extension-toolkit
- When trying zet run: Error: Cannot find module 'portfinder'. Run.a npm cache clean --force. I didn't bother resolving this other than having a terminal with the command zet pack ready every time which returns me the ZIP file to upload by editing the widget in ZohoCreator. I'd preview it in Zoho Creator rather than the site that had embedded it.
Source(s):
- Zoho Creator - Understand Widgets
- Bootstrap - Getting Started
- jQuery - Latest Stable Versions
- OpenJS Foundation - NodeJS
- Zoho - Widgets in Zoho CRM
Category: Zoho :: Article: 732